These 3-ingredient Cocoa Krispie Treats are a fun chocolatey twist on the gooey marshmallow bars we all grew up eating. This no-bake dessert is a chocolate lovers dream, and will quickly become your family’s new favorite sweet treat!

Our 3-ingredient chocolate rice krispie treats are the perfect mix of ooey-gooey deliciousness and chocolate crispy texture that will have you reaching for more. With step-by-step photos, tips for making the best bars, and easy to follow instructions, you’ll have this no-bake dessert ready in no time!
You know I love no bake dessert recipes, but rice krispie treats in particular have an extra special place in my heart. Growing up, my mom could make these at a drop of a hat when friends came over and they were always PERFECT (seriously, she’s magic when it comes to these). In college, I was introduced to versions made with different cereals in the dining hall, and fell in love. I’ve been making my own variations ever since (some of our family’s favorites include lucky charms treats, fruity pebbles treats, and s’mores treats with golden grahams).
With over 15 years of rice krispie making experience, I’ve had the opportunity to learn a lot of tips for making the very best bars. I’ve shared my best advice for you (see the ‘Expert Tips’ section below) so you can make an excellent pan of bars the first time!
Jump to:
- Why You’ll Love these Chocolate Rice Krispie Treats
- Chocolate Rice Krispie Treats Ingredients
- How to Make Cocoa Krispies Treats
- Recipe Variations and Substitutions
- Storing Chocolate Rice Krispie Treats
- Expert Tips for Cocoa Krispies
- Recipe FAQs
- Love this Recipe? You May Also Enjoy
- More Recipes You’ll Love
- Cocoa Krispie Treats
Why You’ll Love these Chocolate Rice Krispie Treats
Just 3 ingredients! All you need is salted butter, mini marshmallows, and your favorite chocolate rice krispie cereal to make these delicious treats! No need for additional spices, extracts, or salt.
Bursting with chocolate flavor. Thanks to the use of chocolate cereal, this no bake treat is a wonderfully chocolatey rendition of the classic version.
Easy to make. We use the microwave for our recipe, making this no bake treat extra simple! A great recipe for beginner cooks, older kids, and teenagers to try making.
A crowd pleaser for kids and adults alike! This easy treat is always a crowd pleaser when brought to parties, cookouts, bake sales, potlucks, and picnics. My kiddo and husband would easily devour an entire pan if I let them too…
Chocolate Rice Krispie Treats Ingredients
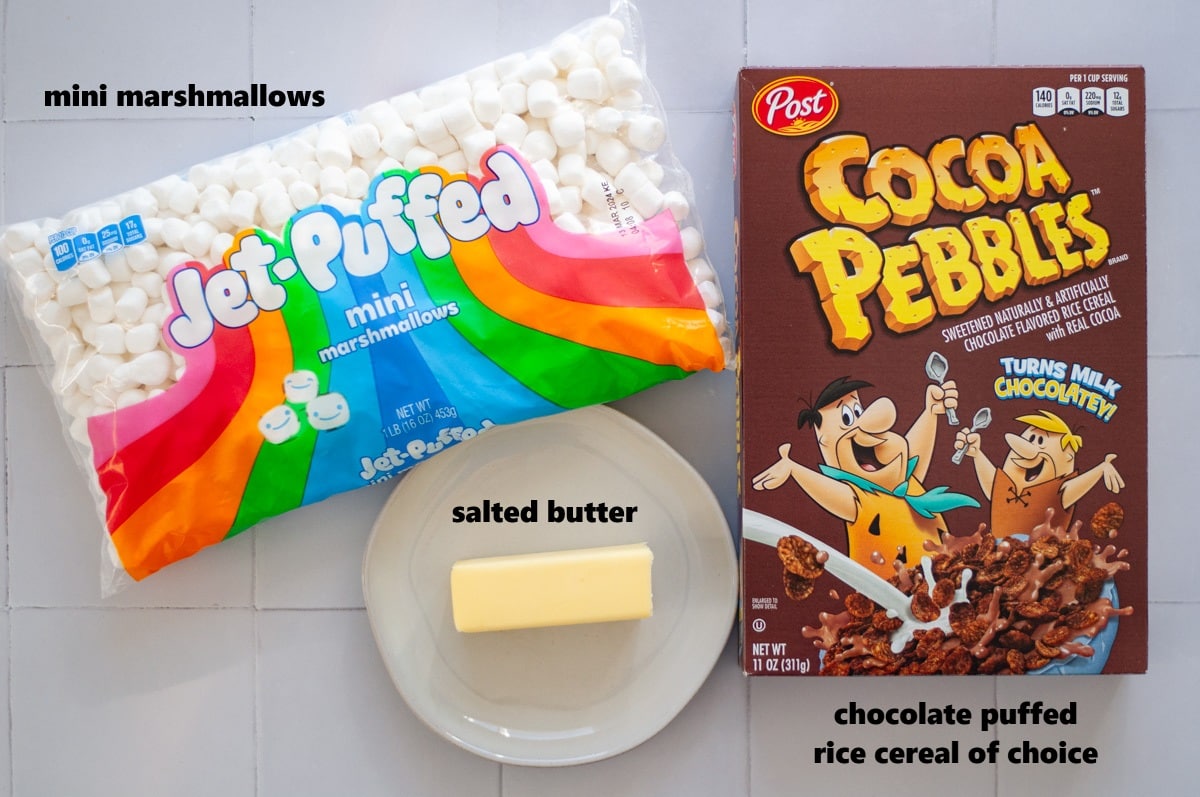
- Salted Butter. I use salted butter in this recipe to add depth of flavor and balance out the sweetness.
- Mini Marshmallows. We’ve both melting and mixing in extra marshmallows into our bars, so miniature marshmallows is the way to go!
- Chocolate Cereal. Grab a box of your favorite cocoa rice krispies for this cereal treat recipe. I usually use Cocoa Pebbles, but Cocoa Krispies are a great option for this chocolate version too.
See the recipe card below for a full list of ingredients and measurements.
Helpful Equipment
You’ll need a large microwave-safe mixing bowl, a rubber spatula, and a 9×13-inch baking dish. An 8×8 square baking dish would also work, you’ll just end up with thicker bars.
How to Make Cocoa Krispies Treats

Hold back 1 cup of mini marshmallows. Then add the rest along with the salted butter into a large, microwave-safe mixing bowl.

Begin by heating the butter and marshmallows for 1 minute in the microwave. Stir to coat the marshmallows with the melting butter.

Place the bowl back into the microwave and heat for another 1 minute.

Stir again until the butter and melted marshmallows are fully incorporated.

Pour half of the chocolate cereal into the melted marshmallow mixture.

Stir to fully coat the cereal.
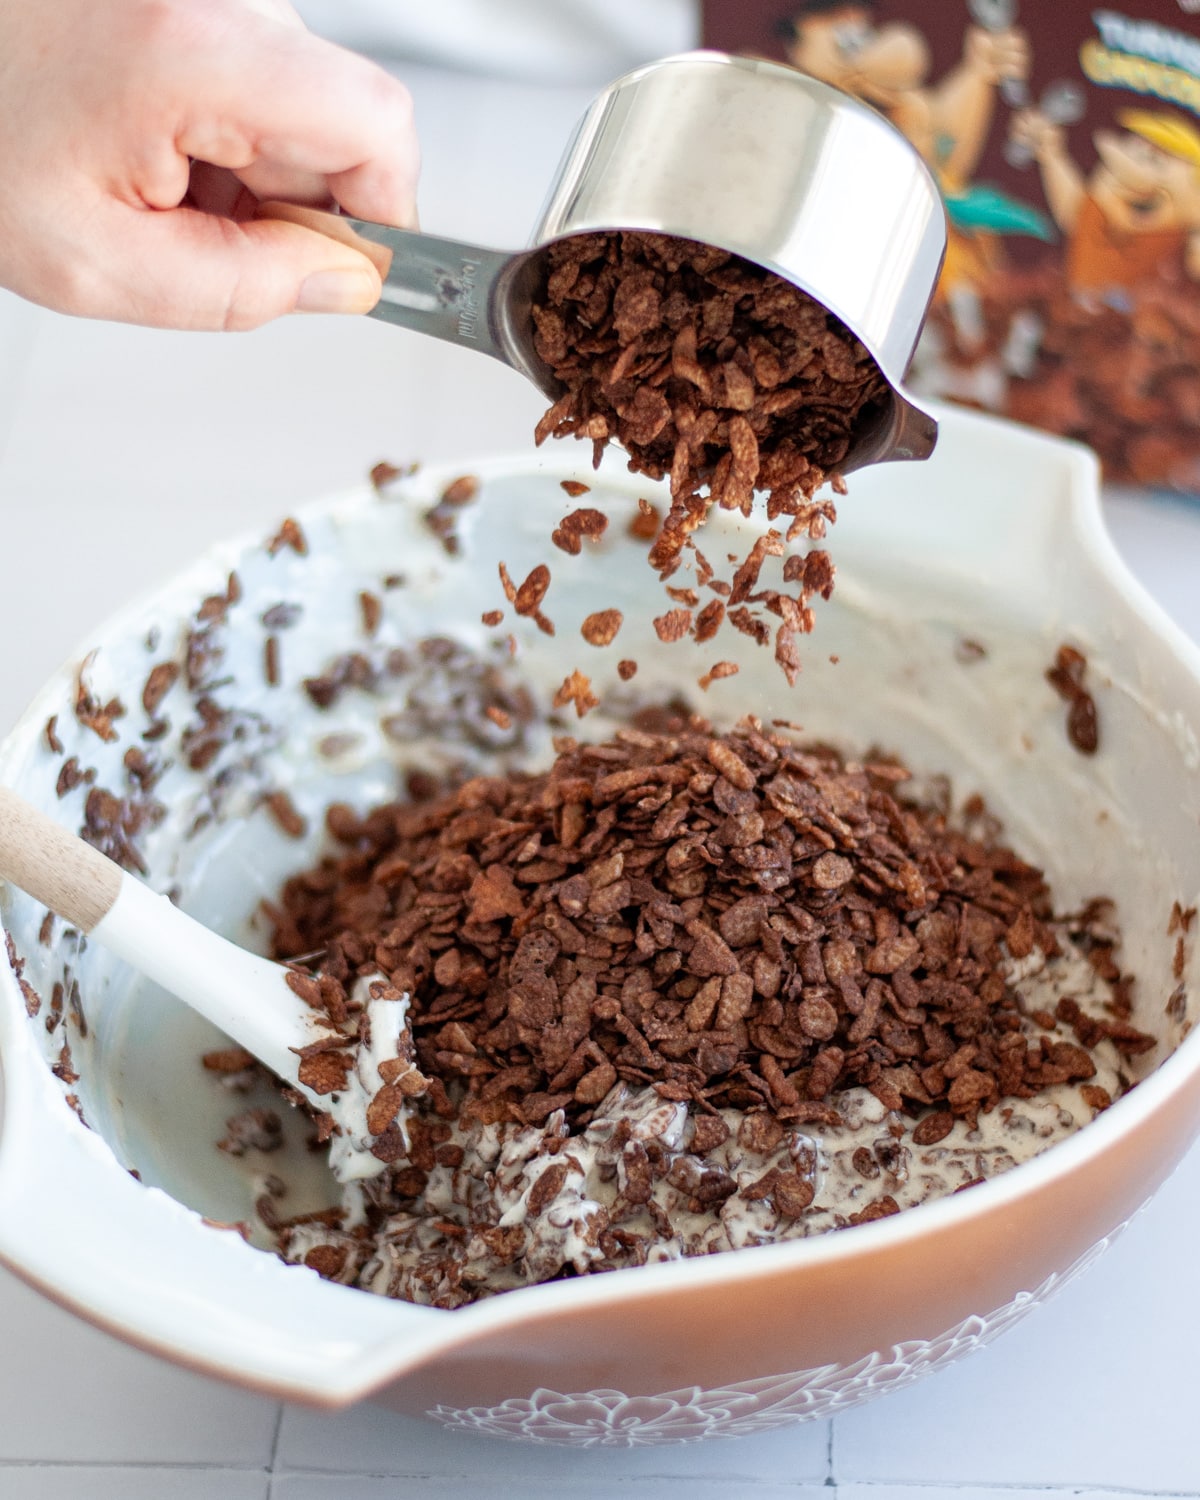
Pour in the remaining cereal.
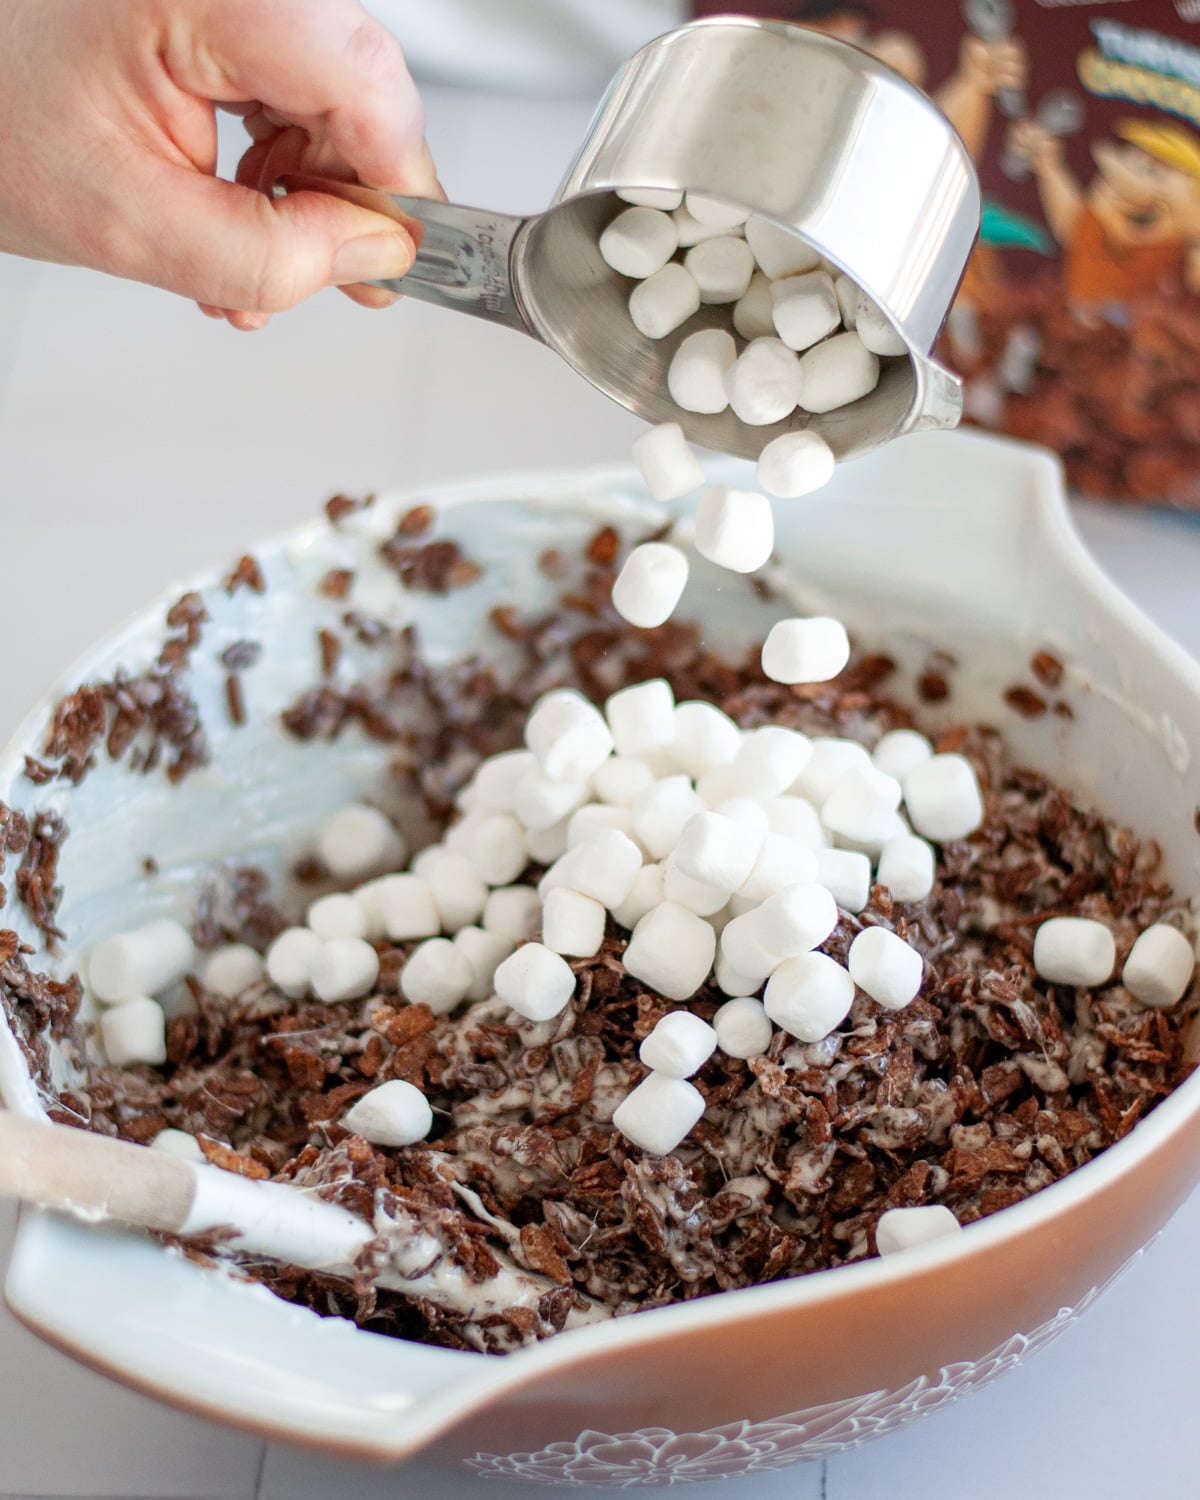
Then add the reserved mini marshmallows.

Stir until the cereal has been fully coated with the marshmallow and butter mixture.

Pour the chocolate rice krispie mixture into a 9×13 pan.

GENTLY press the mixture into an even layer, and to the edge of the pan.

Allow the bars to cool for at least 1 hour before slicing.
Recipe Variations and Substitutions
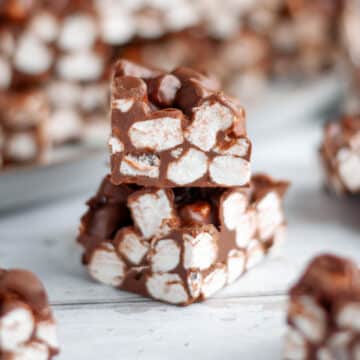
- Turn these into double chocolate rice krispie treats! You can add even more chocolate to these bars if you’d like, and there are several ways to do it! Add a half cup of semi-sweet chocolate chips to your large bowl when microwaving the butter and marshmallows to mix it right in. Toss in some chocolate chips when you add in the extra marshmallows. Or use a small bowl to make melted chocolate in the microwave and add a chocolate drizzle on top of your bars.
- Add vanilla extract. If desired, you can add a splash of vanilla extract to your bars (but I don’t find it necessary).
- Use large marshmallows. If desired, you can use regular marshmallows in this recipe. I’d just recommend melting the full amount along with your butter (do not hold any back to fold in later). If you want to fold some into your bars per the recipe, you’ll have to chop them up into smaller-sized pieces to do so.
- Use the stovetop. If preferred (or you don’t have a microwave), you can melt the butter and mini marshmallows on the stovetop. Do so in a large saucepan over low heat.
Possible Dietary Restrictions?
Post Cocoa Pebbles are gluten free, as are and most brands of mini marshmallows, making this a gluten free recipe. Note: Kellogg’s Cocoa Krispies are NOT gluten free. Something to keep in mind if you’re making these for someone with celiac.

Storing Chocolate Rice Krispie Treats
Chocolate rice krispie treats can be stored in an airtight container, in the pan covered with plastic wrap, or in zip-top plastic bag at room temperature for 3-5 days. But I doubt they’ll last that long!
Refrigeration isn’t necessary, but these cocoa krispie treats will be just fine if you’d like to store them in the fridge.
Expert Tips for Cocoa Krispies
- Be sure to GENTLY press your cereal and marshmallow mixture into your pan. Using too much force will result in hard and dense bars vs. the soft and airy bars we want!
- Don’t use an old, opened bag of marshmallows that have been in your cupboards since last summer (you have one of those in the back of your pantry too, right?). Old stale marshmallows result in hard and stale marshmallow treats!
- I use a clean rubber scraper (silicone spatula) to press the mixture into the pan. If preferred, you can use your fingers. Dipping your fingers into water before pressing the mixture into the pan will help the mixture from sticking to your hands.
- Resist the urge to dive in and allow your treats set for 1 hour (or longer). This will make cutting them much easier!
- If making these on the stove, it’s important that you use LOW and SLOW heat. If you try to speed up the process with high heat, you’re more likely to burn the sugar in the marshmallows.

Recipe FAQs
Yes, you can make this chocolate rice krispie treat recipe with marshmallow fluff. However, it’s not a 1:1 substitute for melted marshmallows. You’ll want to find a recipe that specifically calls for marshmallow fluff.
Love this Recipe? You May Also Enjoy

More Recipes You’ll Love
- Vegetarian Stuffed Peppers with Quinoa
- Cream Cheese Fruit Dip (2 Ingredients)
- Cherry Crinkle Cookies
- Gold Rush Bourbon Cocktail
- Butterscotch and Chocolate Chip Cookies
- Sweet Potato Casserole With Oatmeal Topping
- Mexican Tuna Recipe
- Holiday Puppy Chow
- Cranberry Mimosa Recipe
- Maple Doughnuts
- Baileys Espresso Martini Recipe
- Lettuce Wrap
- Starbucks Vanilla Sweet Cream Recipe
- Blueberry Simple Syrup Recipe
- Coconut Cocktail
- Homemade Vanilla Simple Syrup
- Fried Apple Recipe with Brown Sugar
- Stovetop Tuna Casserole
- Creamed Corn Crockpot
- DIY Simple Syrup
- Bourbon Peach Smash Recipe
- Pigs in a Blanket Hot Dogs
- Summer Tortellini Pasta Salad
- Strawberry Muddy Buddies
- Broccoli Cheddar Egg Bake
- Sugar Cookie Syrup Starbucks
- Cook Bacon in the Oven
- Coffee Flavored Protein Shake
- Brown Sugar Oatmilk Shaken Espresso
- Pineapple Mango Smoothie Recipe
- White Chocolate Mocha Iced
- Starbucks Iced Brown Sugar Oatmilk Shaken Espresso Recipe
- How to Make Frozen Strawberry Daiquiri
- Pumpkin Bars with Shortbread Crust
- Best Skinny Margarita Recipe
- Homemade Condensed Cream of Chicken Soup
- Easy French Onion Soup Recipe
- Chocolate Cherry Cookie
- Smoked Salmon Quiche
- Cucumbers and Vinegar
- Savory Monkey Bread Recipe
- Mocktail Mojito
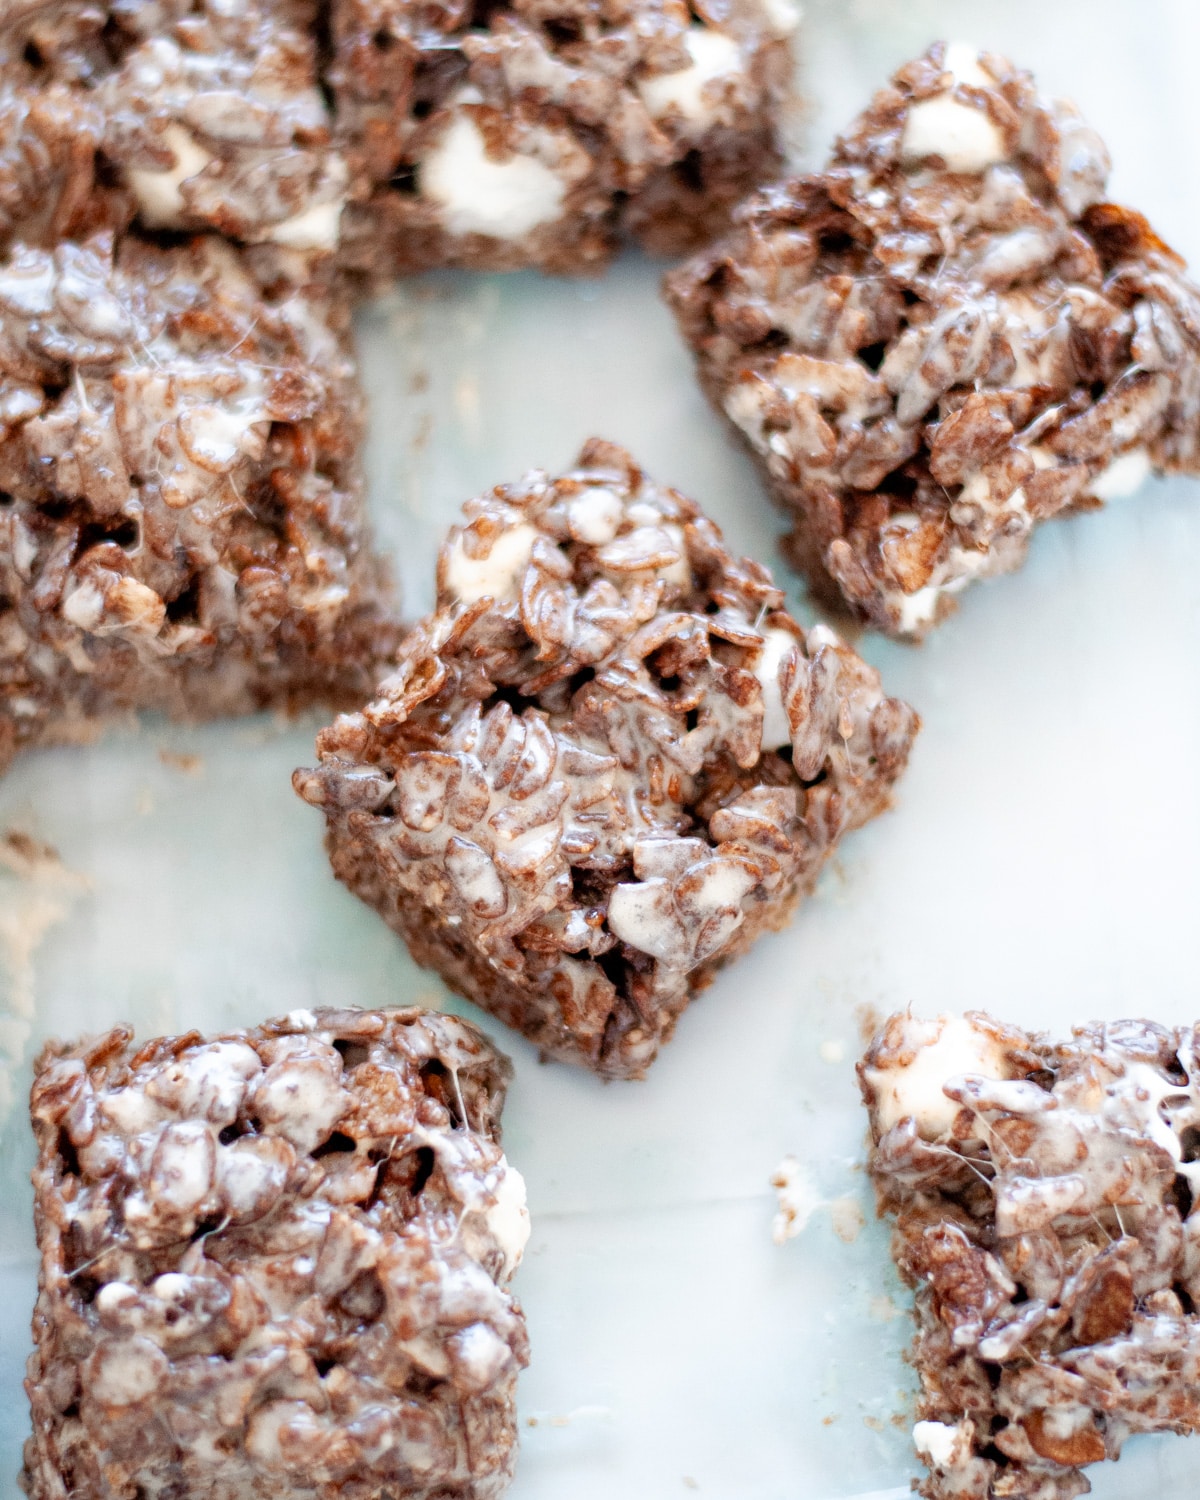
Cocoa Krispie Treats
Ingredients
- 16 ounces mini marshmallows (1 cup reserved to mix in later)
- 6 Tablespoons salted butter
- 6 Cups Chocolate Puffed Rice Cereal (such as Cocoa Krispies or Cocoa Pebbles)
Instructions
- Reserve 1 cup of mini marshmallows, and then place remaining marshmallows and butter into a large, microwave-safe mixing bowl.
- Begin to melt butter and marshmallows for 1 minute in the microwave. Stir using a rubber spatula, and then place back into the microwave and cook for another 1 minute. Stir again until the melted marshmallows and melted butter are incorporated.
- Place half of the chocolate cereal into the bowl with the melted marshmallow mixture and then stir to combine.
- Add the remaining cereal and reserved 1 cup of mini marshmallows, stirring to combine until all of the cereal has been coated with the marshmallow and butter mixture.
- Transfer the mixture to a 9×13 pan and GENTLY press to push the mixture to the edge of the pan.
- Allow to cool for at least 1 hour.
- Cut and enjoy!
Notes
- Turn these into double chocolate rice krispie treats! You can add even more chocolate to these bars if you’d like, and there are several ways to do it! Add a half cup of semi-sweet chocolate chips to your large bowl when microwaving the butter and marshmallows to mix it right in. Toss in some chocolate chips when you add in the extra marshmallows. Or use a small bowl to make melted chocolate in the microwave and add a chocolate drizzle on top of your bars.
- Add vanilla extract. Some similar recipes call for vanilla extract. I don’t think it’s necessary, but you can add a splash if you’d like!
- Use large marshmallows. If you can’t find mini marshmallows at the grocery store, you can use regular marshmallows. Just melt the full amount along with your butter (do not hold any back to fold in later). They’ll still be super awesome! If you do want to fold some of your larger marshmallows into your mixture per the recipe, you’ll have to chop them up into smaller-sized pieces to fold into the cereal mixture at the end.
- Use the stovetop. If you don’t have a microwave, you can still make this recipe! Simply melt the butter and mini marshmallows on the stovetop in a large saucepan over low heat.


Mary says
Terrific chocolatey treat! Love the mini marshmallows. I will make these!
Meredith says
I’m so glad to hear you loved these!! Thanks Mary 🙂
David says
Big Cocoa Pebbles fan here, so these are perfect! Made these bars and love ‘em!
Meredith says
So happy to hear that you loved these too!!