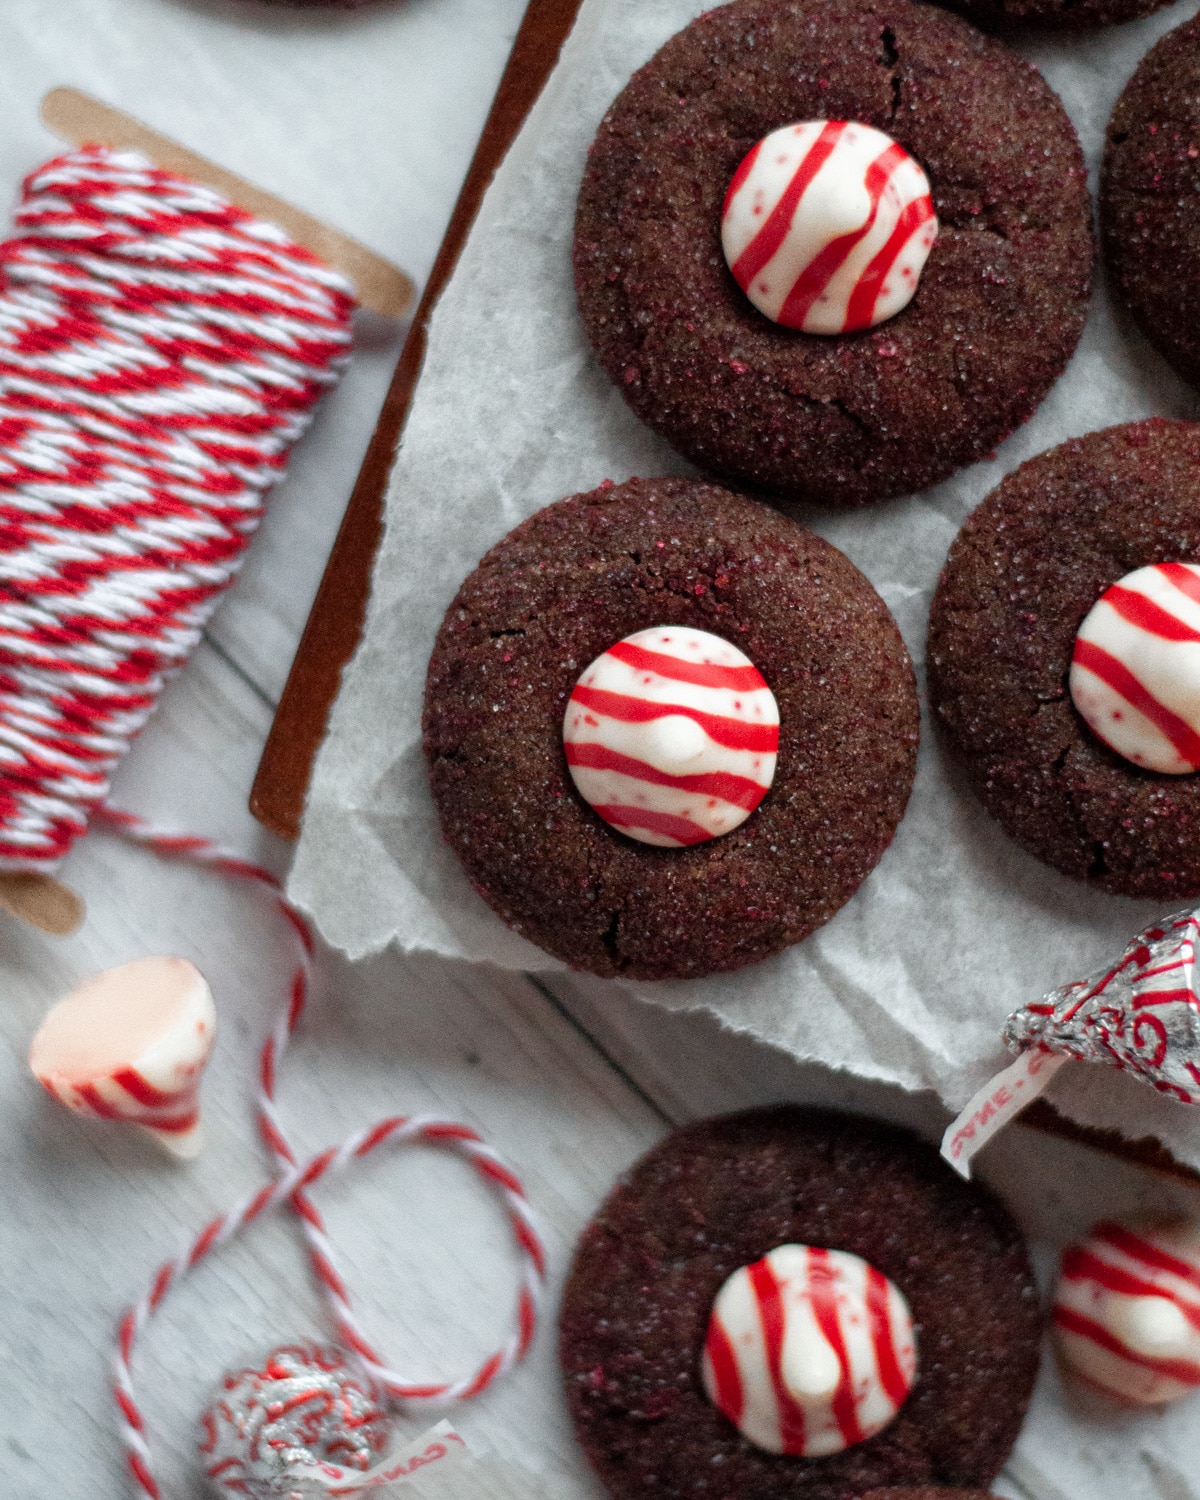
These chocolate peppermint kiss cookies are sure to be a new holiday favorite! With a fudgy chocolate cookie base and adorable striped peppermint kiss candies, these are a MUST this holiday season.

These Candy Cane Kisses Cookies are Holiday Perfection
These chewy chocolate peppermint cookies are a fun holiday treat that you need to make as soon as possible. These peppermint chocolate blossom cookies place candy cane kisses on top of a fudgy chocolate brownie cookie base…pure bliss.
Make this Christmas cookie recipe to bring to your next holiday gathering, to share at a cookie exchange, or to enjoy with a glass of milk with your family for a Christmas movie marathon!
Create the ultimate holiday chocolate lovers cookie tray by pairing these chocolate cookies with candy cane kisses on a cookie plate with Chocolate Cherry Crinkle Cookies, Chocolate Mint Squares, and Death by Chocolate Cookies!
Jump to:
- These Candy Cane Kisses Cookies are Holiday Perfection
- You’ll Love These Peppermint Kisses Cookies
- Ingredients for Chocolate Peppermint Kiss Cookies
- How to Make Peppermint Kiss Chocolate Cookies
- Tips For Making Peppermint Kisses Cookies
- Cookie Tray Tip
- Variations of Peppermint Kiss Cookies
- Storing Chocolate Candy Cane Kisses Cookies
- Peppermint Kisses Cookies FAQs
- Love This Recipe? You May Also Enjoy
- Peppermint Kiss Chocolate Cookies
- More Cookie Recipes to Try
You’ll Love These Peppermint Kisses Cookies
Relatively quick recipe, even with some chill time! You’ll need about 90 minutes to make these peppermint chocolate kiss cookies, including prep, a 30-minute chill-time, and baking your cookies 1 tray at a time.
They are so cute and festive! These chocolate peppermint kiss cookies are just darn adorable for the holiday season. People always comment on them!
Easy to make. A great recipe for all levels of bakers.
Delicious seasonal flavor. Is there anything better than chocolate and peppermint at Christmastime?
Ingredients for Chocolate Peppermint Kiss Cookies
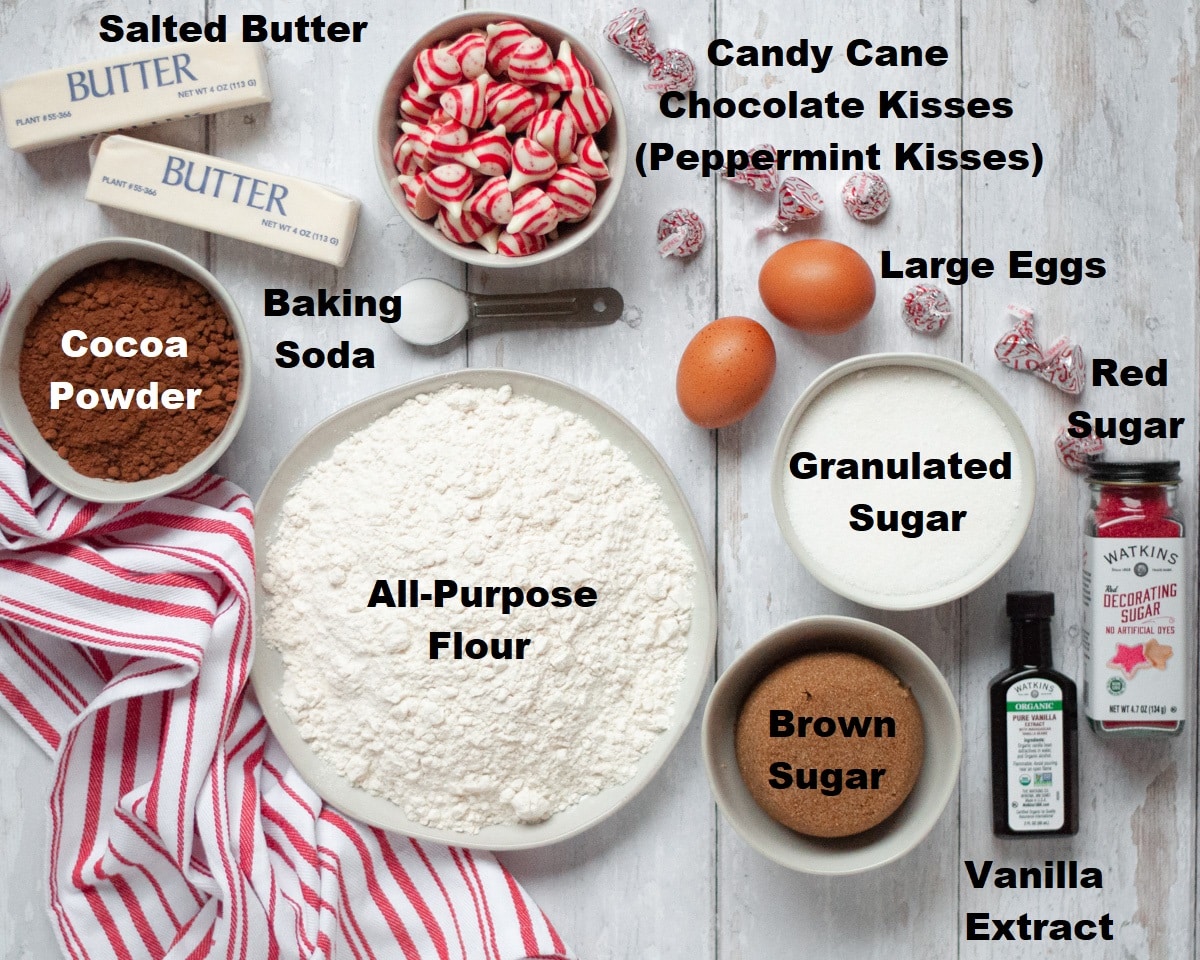
- Candy cane kisses. This is what brings the peppermint flavor to your cookies. And makes these cookies cute and festive. Make sure to buy them early in the season, they often sell out (at least in my area).
- Red and white sugar for rolling. Using both sugars really amps up the cuteness level on these cookies! I highly recommend adding in the red decorating sugar in addition to your granulated sugar in this recipe.
A full list of ingredients and their measurements are included in the recipe card at the bottom of the page.
Ingredient Tip – Room Temperature Eggs
Using room temperature eggs is often suggested for baking because the eggs will incorporate into the softened butter easier. This results in a smooth, uniform batter. If you’re setting your eggs out on the counter to bring them up to room temperature, the standard rule of thumb is to set them out for at least 30 minutes prior to using them.
How to Make Peppermint Kiss Chocolate Cookies
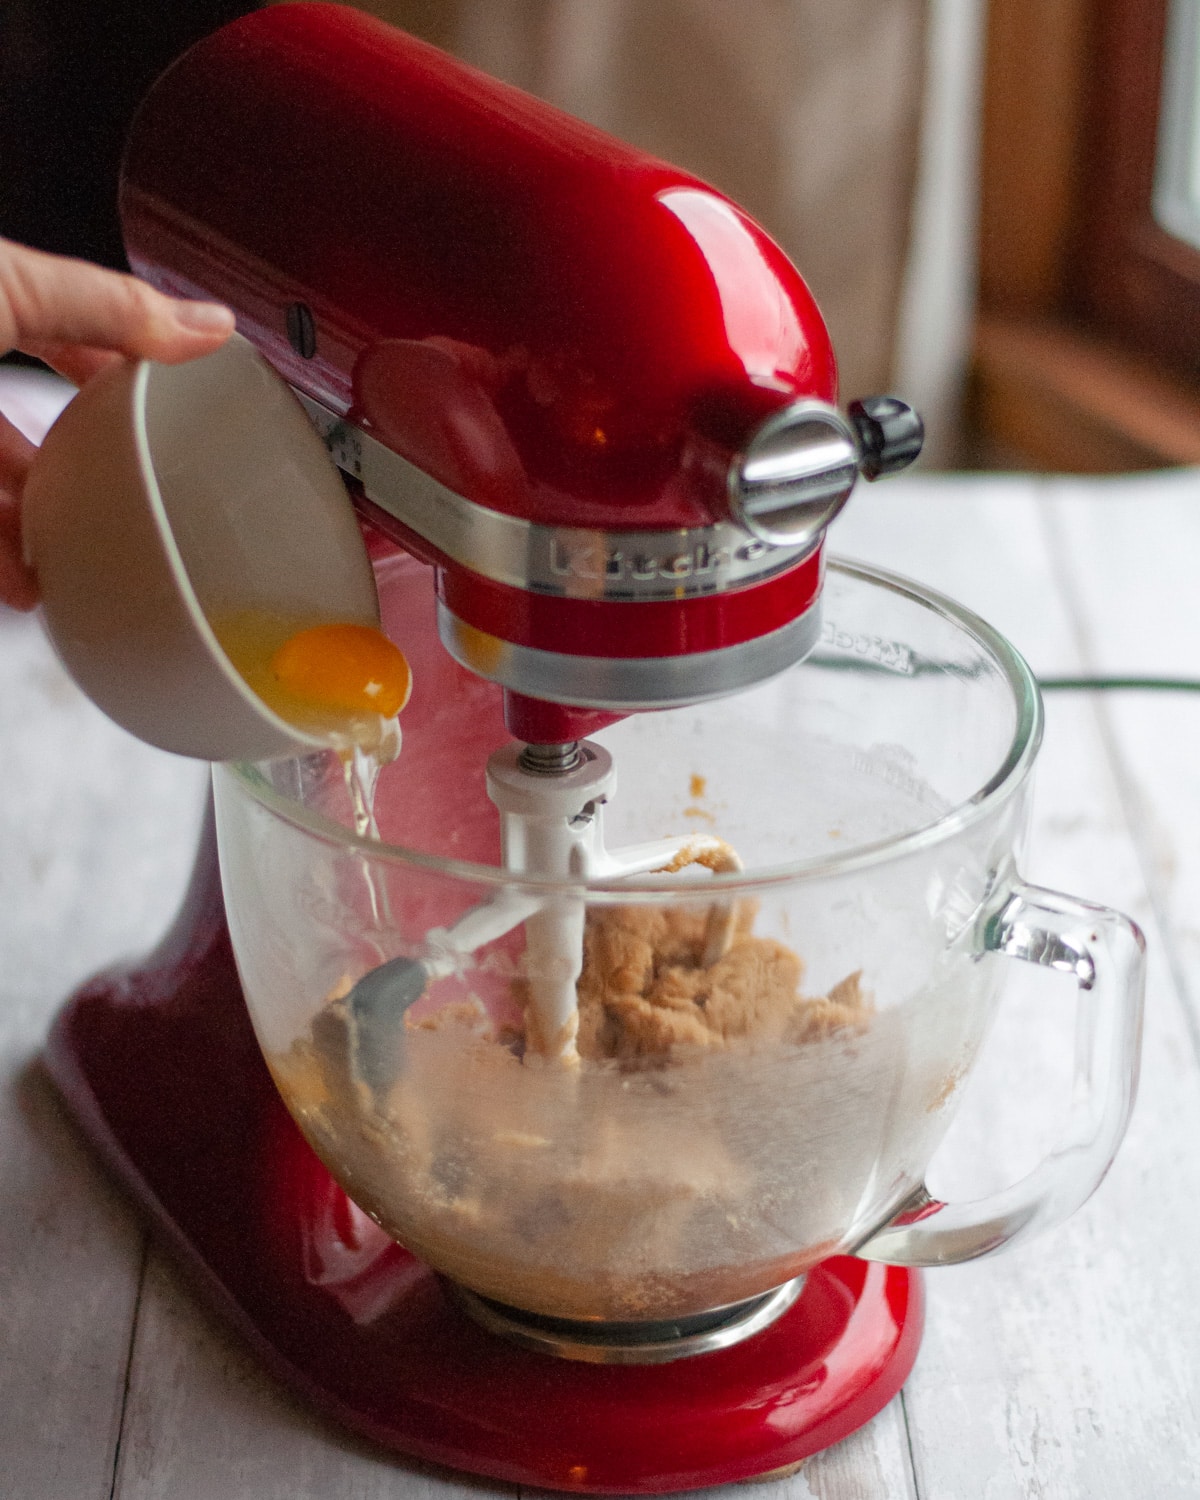
In a large bowl (or bowl of a stand mixer), beat together the butter, granulated sugar, and brown sugar until creamed (a uniform, light, and fluffy mixture). Add in the eggs and vanilla and stir until incorporated.
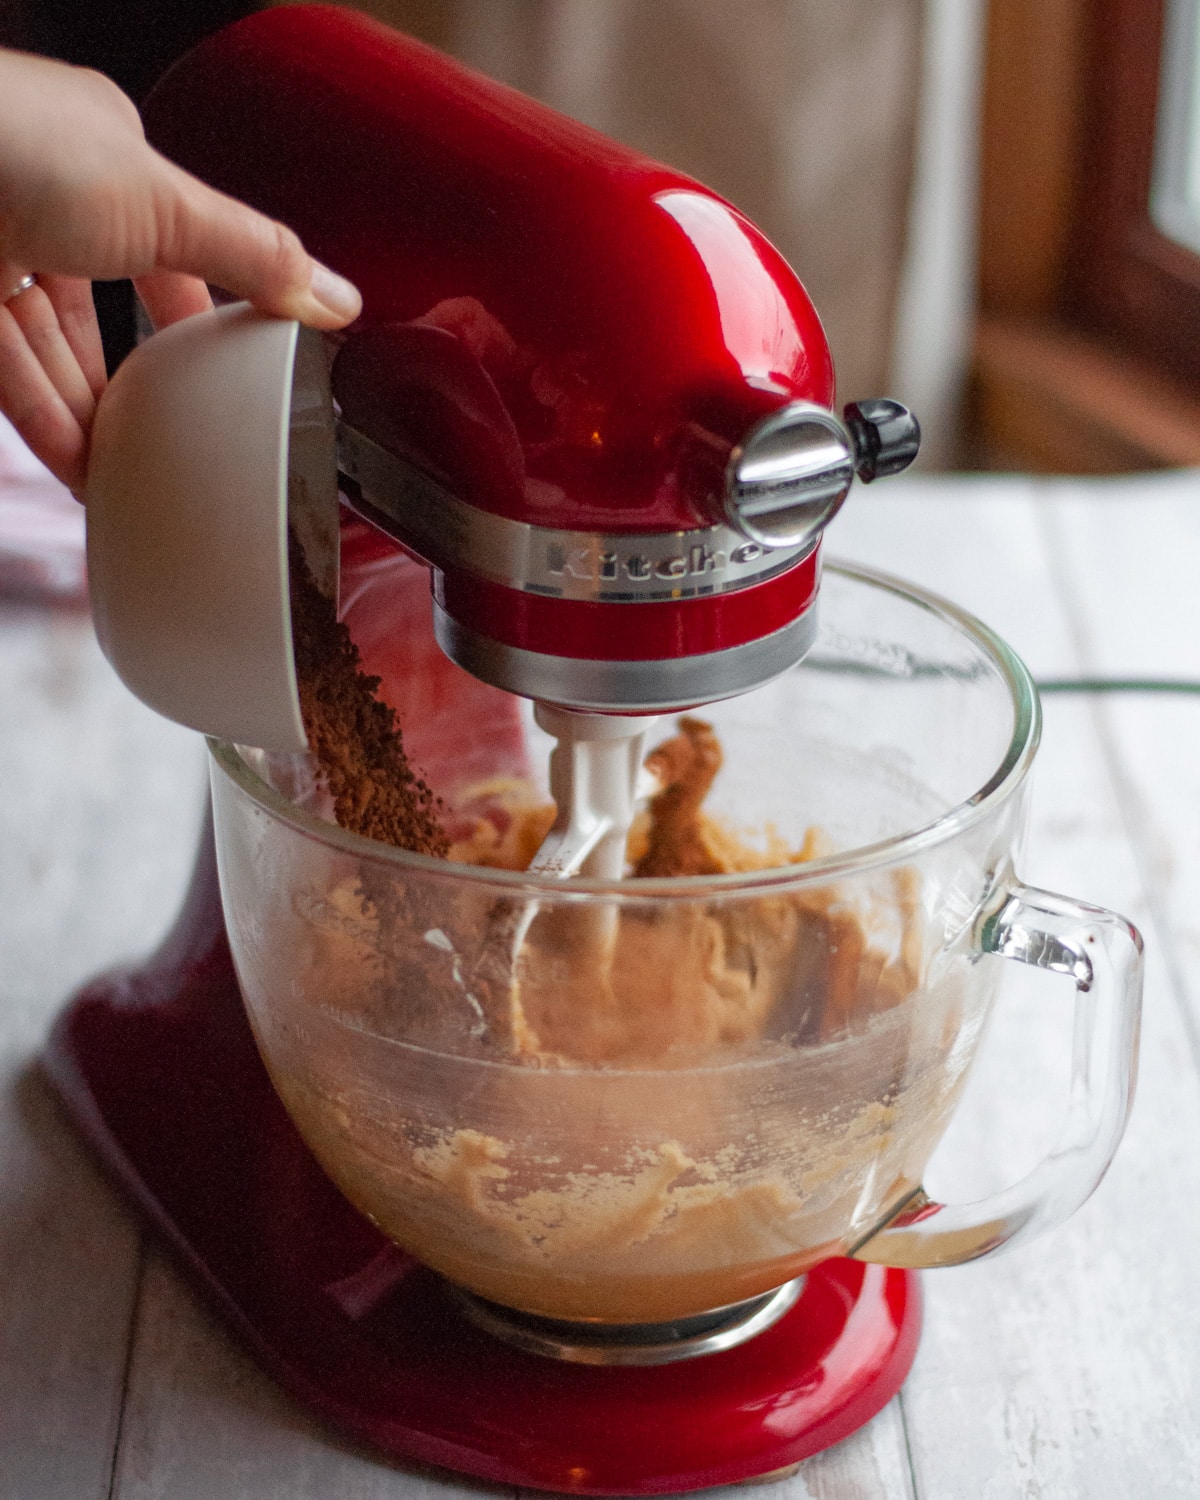
Slowly add in dry ingredients (baking soda, cocoa powder, and flour) and stir until a uniform dough has been created.
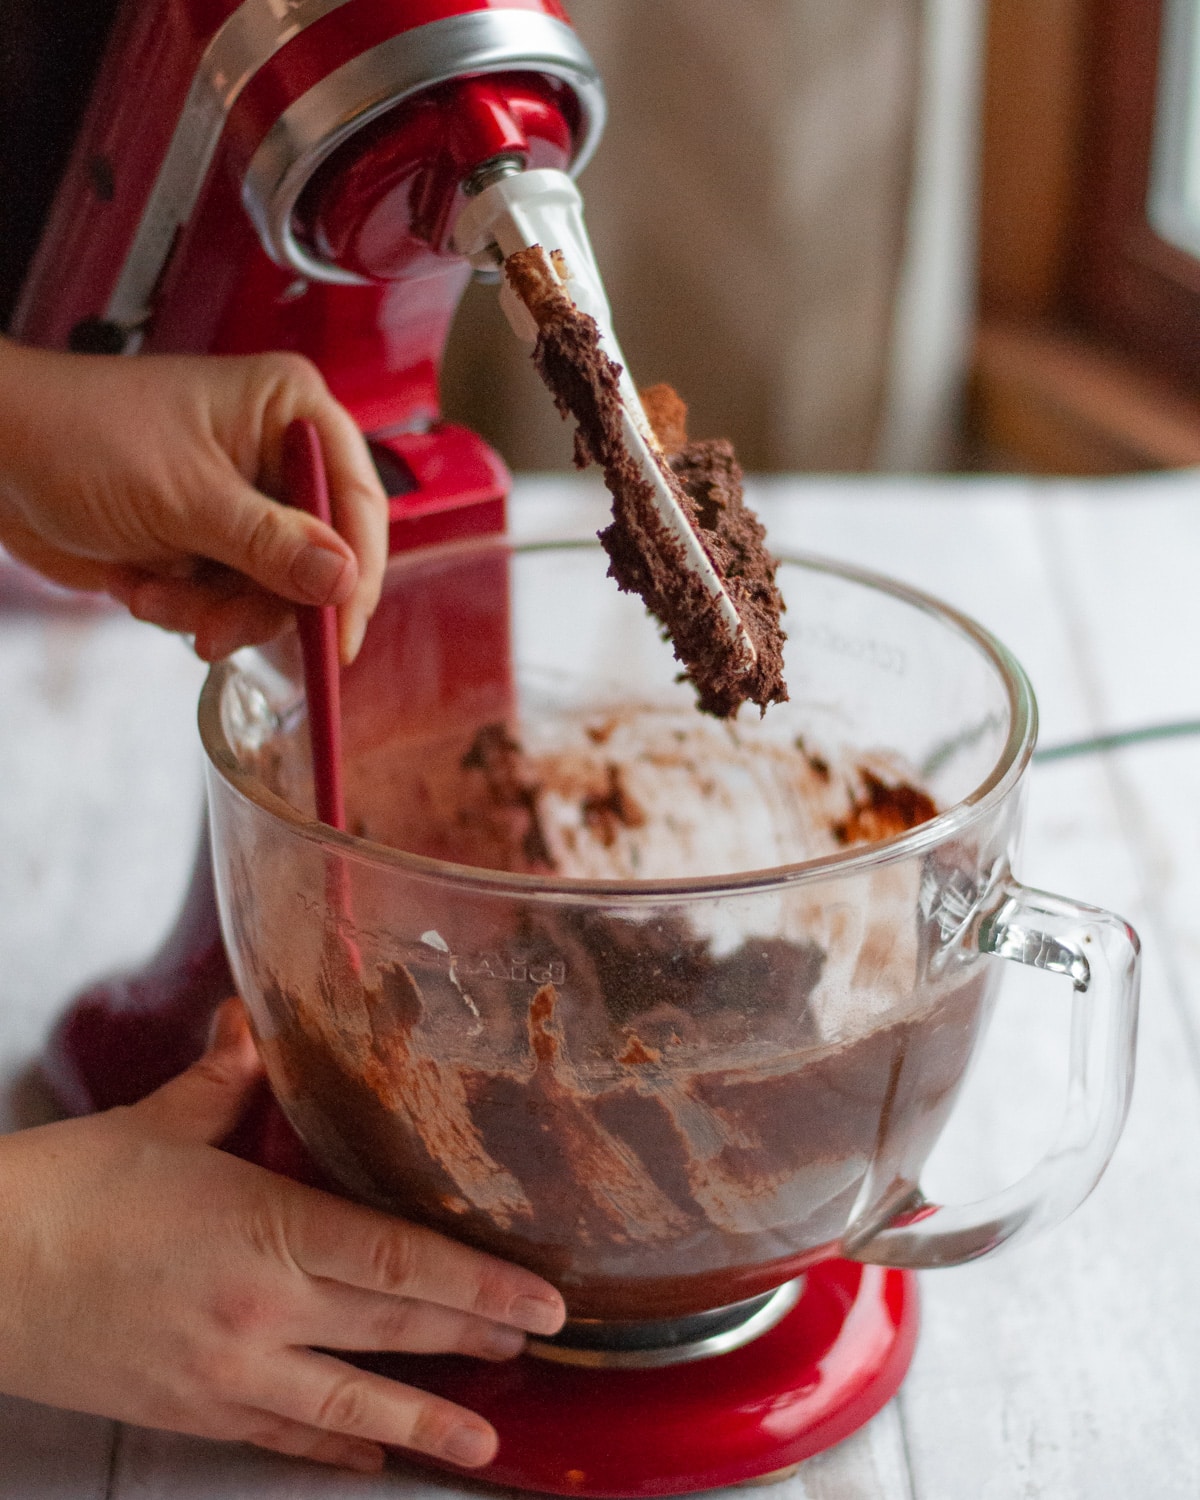
Scape down the sides of your bowl with a rubber scrapper as needed during mixing.
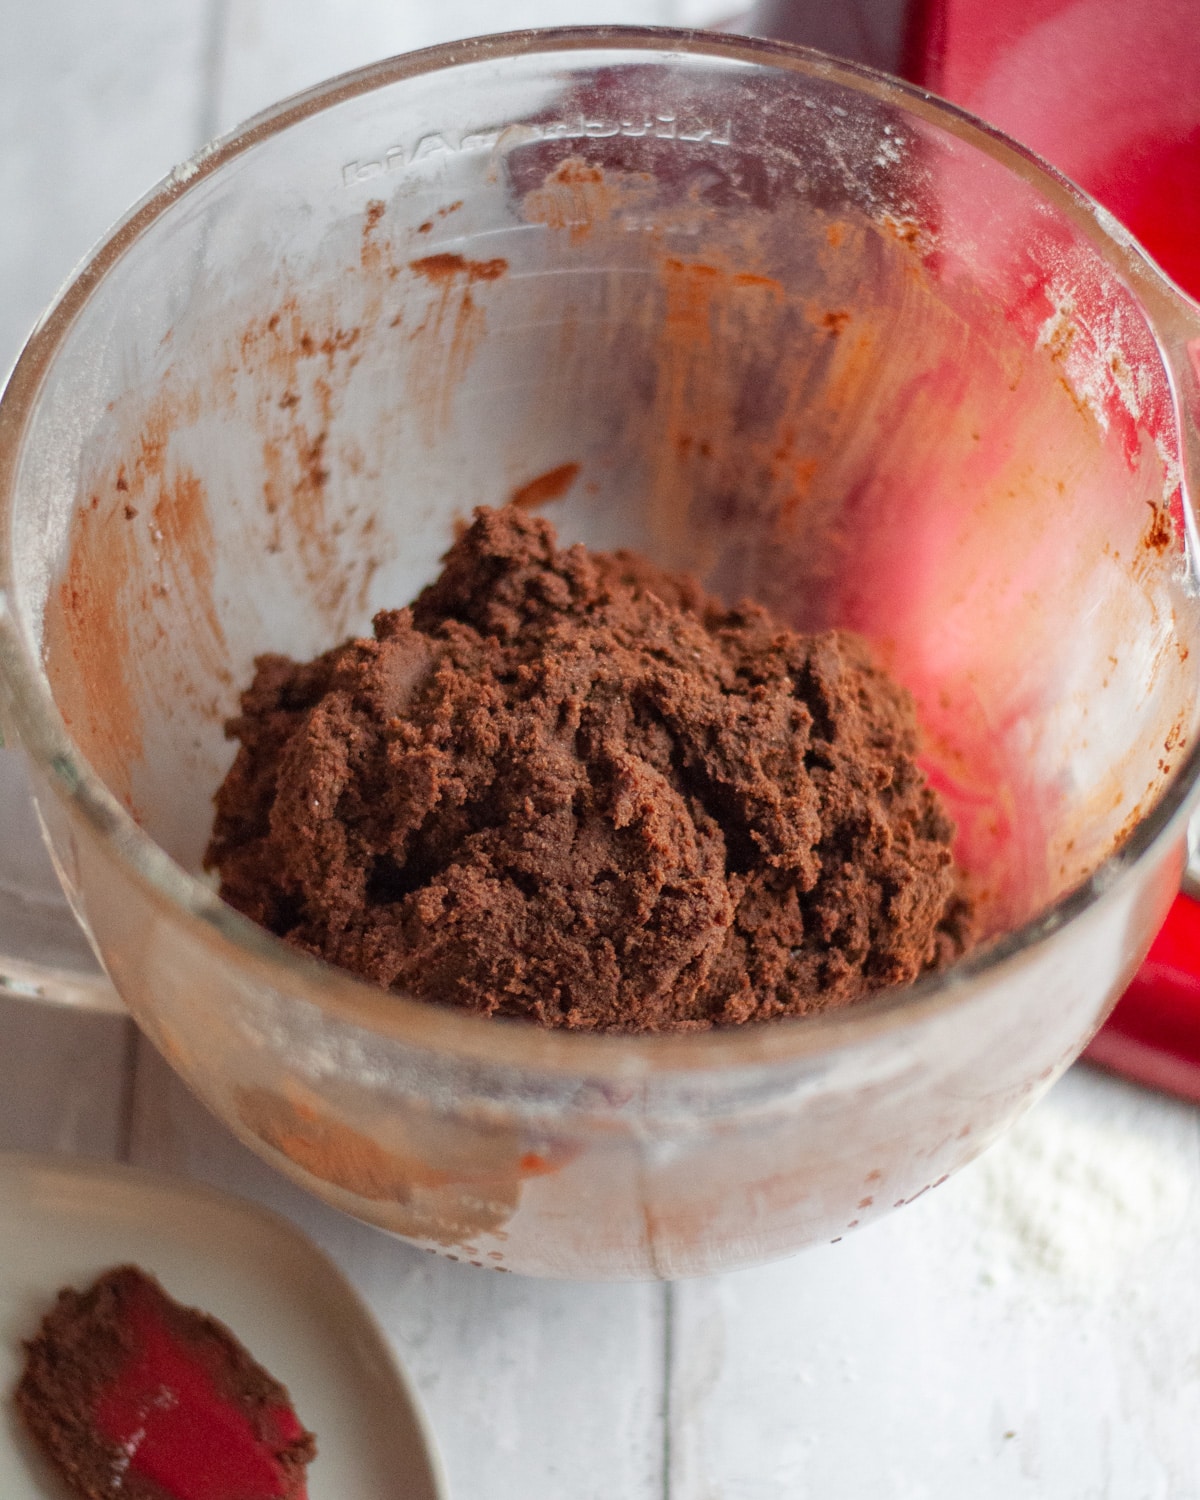
When your dough is ready, cover the bowl with plastic-wrap and chill the cookie dough for at least 30 minutes (up to overnight).
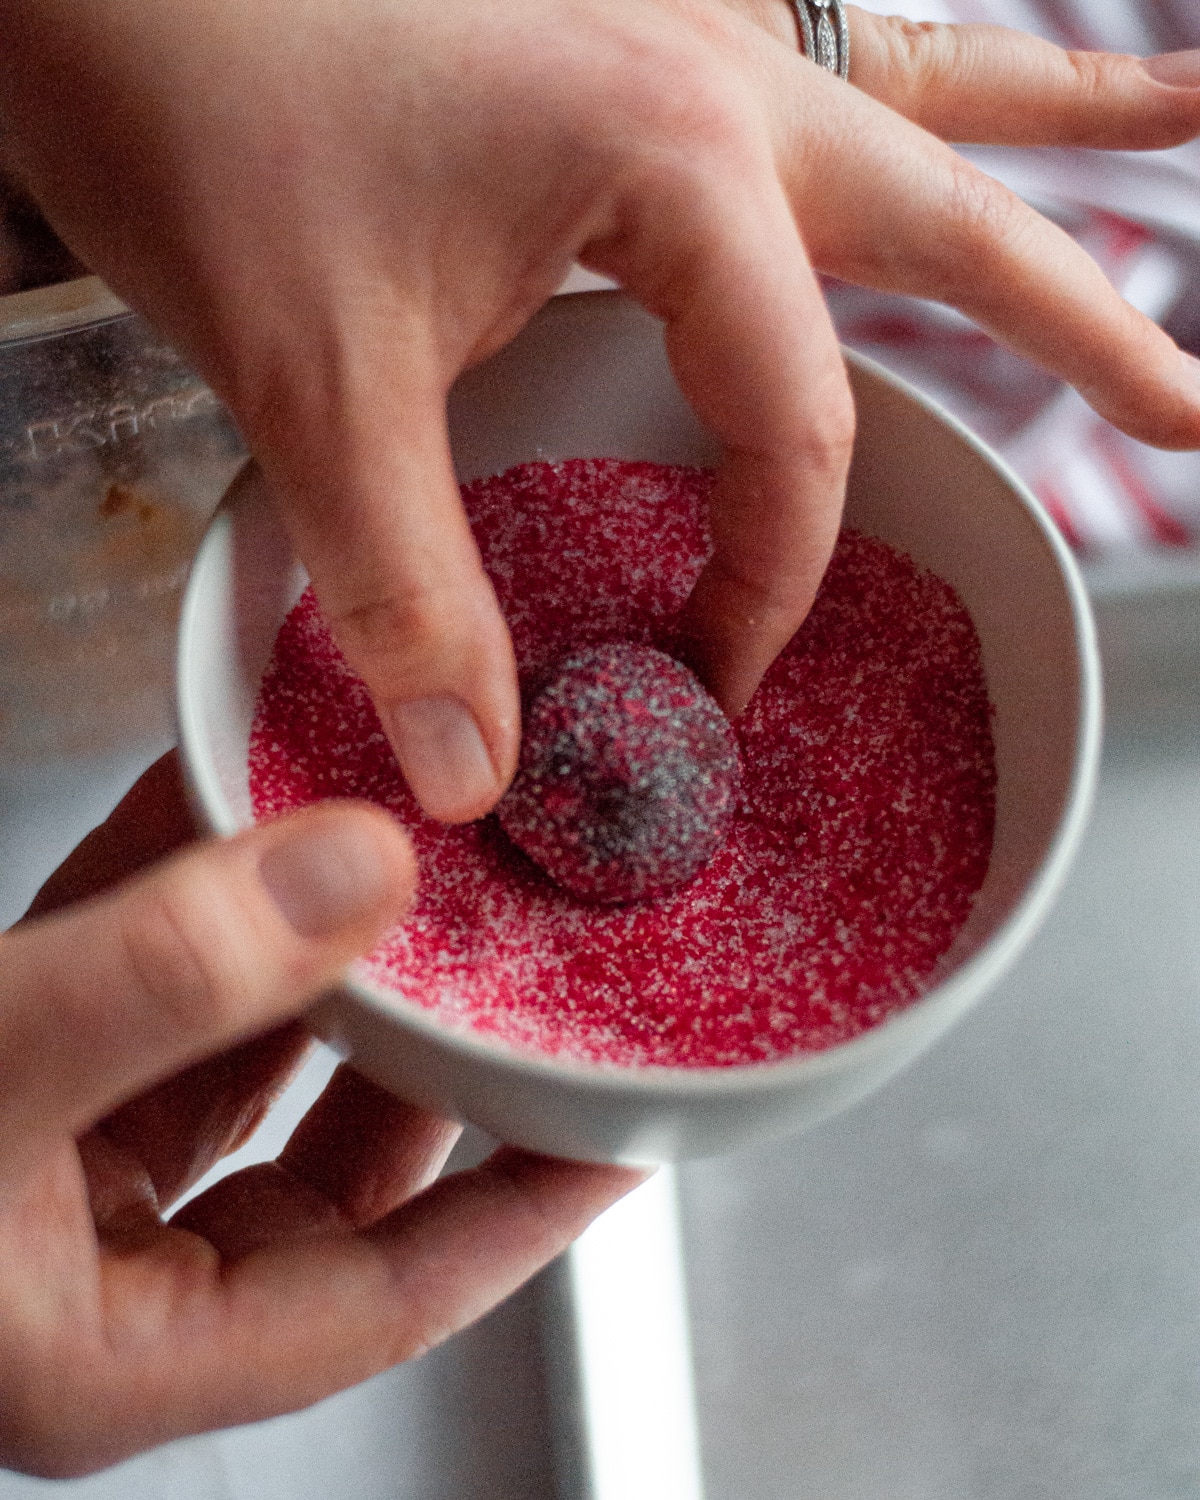
When ready to bake, preheat the oven to 350°F. Scoop 1 tablespoon-sized portions of chilled dough, roll into balls, and roll each ball in a blend of red decorating sugar and granulated sugar until fully coated.

Place 2 inches apart on a baking sheet. Bake for 8-10 minutes.
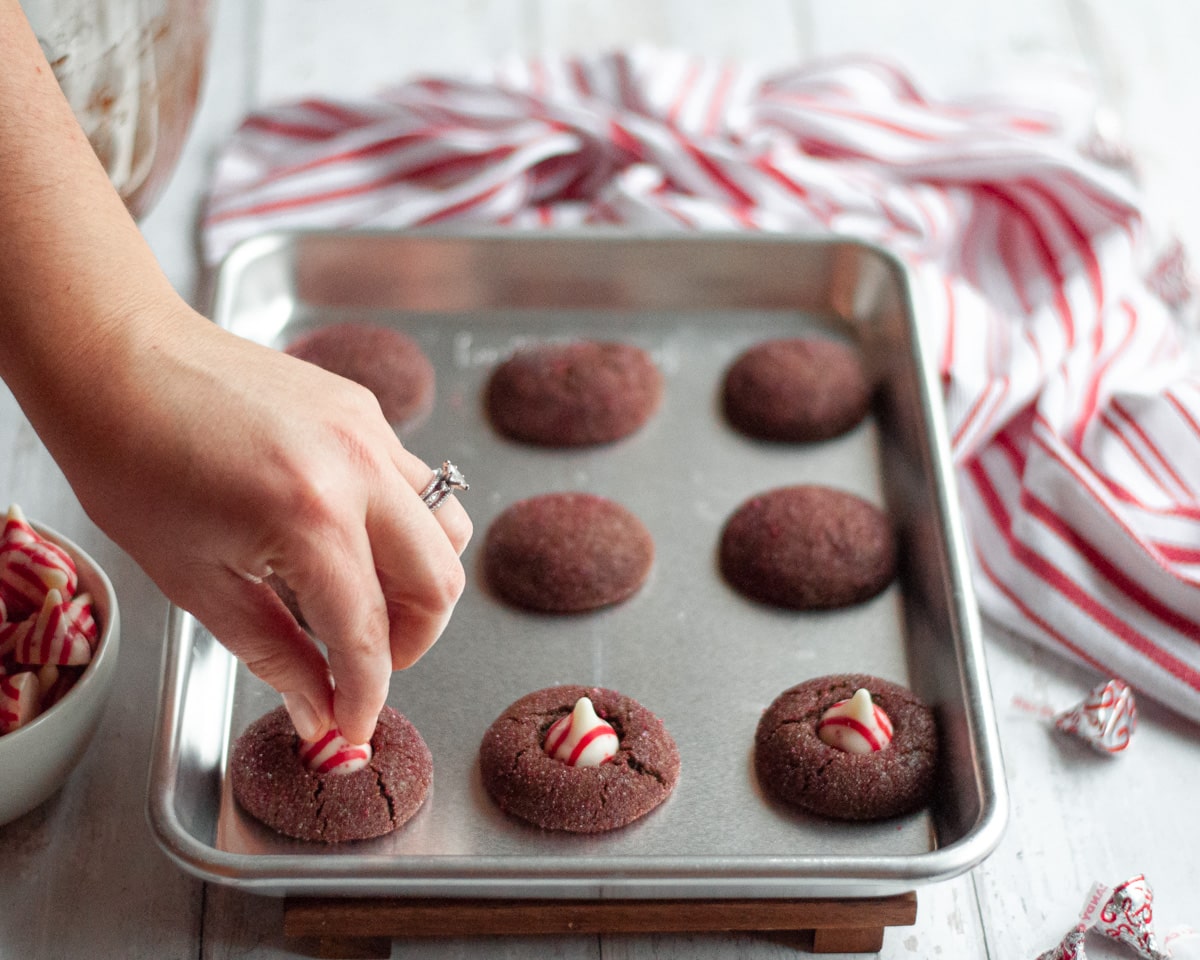
Immediately after removing from the oven, gently push a candy cane kiss into the center of each cookie. Allow the cookies to cool for a few minutes on the baking sheet and then transfer to a wire rack to cool completely.
Tips For Making Peppermint Kisses Cookies
- Do not over bake your cookies. It’s easy to overbake chocolate cookies because you can’t tell when the edges are browning as easily. These cookies are at their best when they are JUST baked and chewy. If the edges are set and the tops are beginning to look dry (not super shiny), give them a little poke. If the cookies don’t sink in a lot, they are ready to come out.
- Have your peppermint kisses unwrapped and ready to go. You want to have your kiss candies unwrapped and ready to place on top of your cookies immediately after they come out of the oven. Once the cookies have cooled and firmed up, it is difficult to add the candy kiss.
- Midwest chilling tip: embrace and use the cold winter weather! If you live in a place that is cold when you make these chewy chocolate cookies with candy cane kisses, you can chill your dough outside! Find a flat surface, ensure your dough is covered well, and let mother nature chill your dough for you.
- Use a cookie scoop to get all of your cookies to be the same size. While not a necessity, a cookie scoop is a super helpful tool that I use a lot in my kitchen. A small cookie scoop is the perfect size for this chocolate peppermint kiss cookies recipe.
Cookie Tray Tip
Because mint is such a strong flavor, putting these peppermint kiss cookies (and our Chocolate Mint Squares) onto a larger cookie tray may cause everything to taste minty. BUT this is easy to avoid! Pack your holiday kiss cookies on a separate plate (at least for transport to your event), and this will prevent this from happening!
Variations of Peppermint Kiss Cookies
- Use a different sugar (or sugar mixture) for rolling. You have several options for sugars to roll your cookie dough balls in:
- In lieu of a red decorating sugar and granulated sugar mixture as noted in the recipe card, you could also use red and white sanding sugar.
- If you do not have a red decorative sugar, just using granulated sugar will work too.
- Make it into a more classic crinkle cookie base and roll your dough balls first in granulated sugar and then in powdered sugar (see this Chocolate Cherry Crinkle Cookies recipe for an example). This will give your cookies a different look (more “snowy”), that will still be cute for the holidays.
Storing Chocolate Candy Cane Kisses Cookies
These chocolate brownie cookies with peppermint kisses can be frozen before or after baking.
How to Freeze Before Baking
Chill the cookie dough as directed in the recipe card. After the dough has been chilled, scoop and roll the dough into balls and chill them again in the refrigerator for 1 hour. Once the cookie dough balls are cold and solid, place them into a large freezer bag.
Freeze the cookie dough for up to 3 months. When it’s time to bake the cookies, remove the dough balls from the freezer and thaw on the counter for at least 30 minutes. Then roll in the red and white sugar mixture as instructed in the recipe. Bake as directed.
How to Freeze After Baking
Ensure cookies are completely cool prior to freezing. Store baked cookies in a a freezer bag or air-tight container in the freezer for up to 3 months. Separate layers of cookies with parchment paper (this helps prevent them from sticking together). When ready to enjoy, thaw cookies in the refrigerator or on the counter at room temperature.
Peppermint Kisses Cookies FAQs
Store completely cooled cookies in an air-tight container at room temperature for up to 5 days.
Yes! You can freeze the dough before cooking or freeze the cookies after baking. See the ‘Freezing These Cookies’ section above for full details.
Tip 1: Some people like to unwrap and freeze the kisses for 20 minutes (up to a few hours) before pressing them into the hot cookies to help them hold their kiss shape.
Tip 2: Once the cookies come out of the oven and a kiss is pressed into each, leave them on the baking sheet to cool completely before removing. If they are moved too soon, the kisses may shift and lose their shape.
Love This Recipe? You May Also Enjoy


Peppermint Kiss Chocolate Cookies
Ingredients
- 1 C salted butter softened
- 1 C granulated sugar
- 1 C brown sugar
- 2 teaspoon vanilla extract
- 2 large eggs
- 1 teaspoon baking soda
- ¾ C cocoa powder
- 2 + ¼ C all-purpose flour
- Pinch of salt
- ¼ C red decorating sugar for rolling
- ¼ C granulated sugar for rolling
- 1 package Hershey’s candy cane kisses
Instructions
- In a large bowl (or bowl of a stand mixer), beat together butter, granulated sugar, and brown sugar until creamed (a uniform, light, and fluffy mixture).
- Add in eggs and vanilla and stir until incorporated.
- Slowly add in dry ingredients (baking soda, cocoa powder, and flour) and stir until a uniform dough has been created.
- Cover and chill for at least 30 minutes.*
- Place additional granulated (or mix of red decorating and granulated sugar) into a bowl.
- Scoop 1 tablespoon sized portions of dough into your hand and roll into a ball. Roll each dough ball in the sugar and place 2-inches apart on a baking sheet.*
- Bake at 350°F for 8-10 minutes.
- Immediately after removing from the oven, gently push a peppermint kiss cookie into the center of each cookie.
- Let cookies cool on the baking sheet for a few minutes, then move to a cooling rack to cool completely.
- Enjoy!
- Store cooled cookies in an air-tight container at room temperature for up to 5 days.


Aunt M says
These are a favorite! Always a winner at a cookie buffet! Good tip to freeze the kisses!
Meredith says
Thanks Auntie M, I’m glad you love these too! 🥰
Cathy W says
I just made these cookies! They are super easy to make and so delicious!
I did chill the dough between each batch and I did freeze the peppermint kisses so they would hold their shape. Worked great!
Meredith says
So happy to hear these worked well for you Cathy! Thanks for the notes on chilling the dough in between, and glad you used the chilled kiss trick too! Happy Holidays!
David says
Solid cookie recipe. What’s not to love!
Meredith says
So happy that you love these peppermint kiss cookies too!
Martha says
These might be my new favorite cookie! I used extra dark cocoa powder, so they’re not super sweet. Delicious with milk (or red wine!). Aunt Martha
ourlovelanguageisfood says
I’m so glad they were a hit!! Thanks for making these.
Jo says
I don’t know what I did wrong. They came out very flat and tasted salty. I did not put any salt in them. I set the recipe to make 25 cookies before printing. I tried one tonight (Christmas eve) and had to tell my family to not eat them. Ended up throwing out the whole batch
Meredith says
Hi Jo – I’m so sorry to hear this didn’t work out for you! If you didn’t add salt, I don’t know how they would have ended up tasting salty… what kind (brand?) of butter did you use? If they were flat, first I’m curious if you baking soda was expired… did you use it for any other cookies/baking recently? Second, did you chill your dough as noted in the recipe? That can help prevent the cookies from spreading as well.
Candace says
Can you freeze these for later?
ourlovelanguageisfood says
Hi Candace, while I have not frozen this particular type of cookie myself, they should be just fine to freeze.
Once baked, make sure to cool the cookies completely prior to freezing. It is often recommended to place cooled cookies in a single layer on a lined baking sheet to freeze, and once frozen, you can put them into a flat-bottom air-tight container in layers separated by parchment (or in a freezer safe zip-top bag with the extra air squeezed out). Make sure to label and date your container so you know what you have. Most cookies can be frozen for up to 6 months if they’re handled properly and wrapped well. Hope this helps!
Bev says
Made these over the weekend and love them! So easy to make and super yummy!
ourlovelanguageisfood says
Hi Bev, I’m so glad to hear that you enjoyed them!! Thank you for making my recipe.