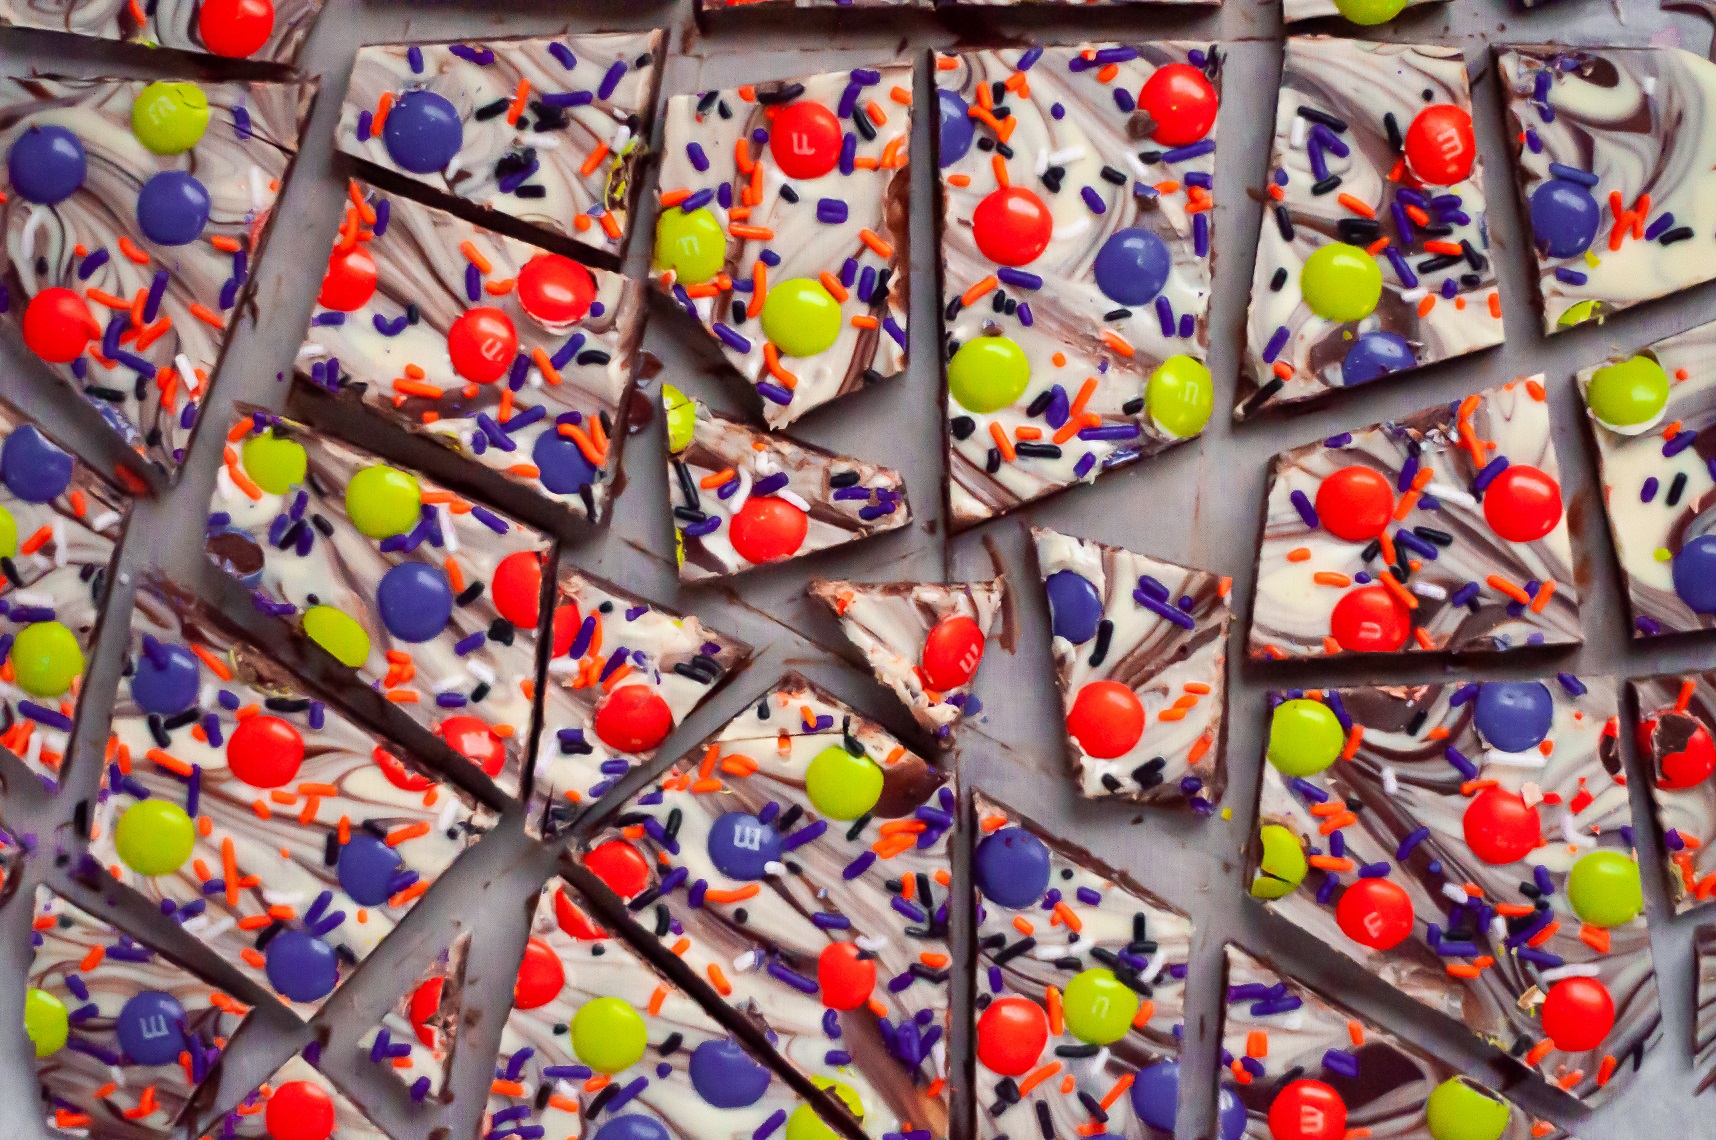
This easy Halloween chocolate bark recipe is a fun addition to your spooky treat rotation! Topped with festive candies and sprinkles for a cute and delicious Halloween treat.
If you’ve been looking for cute Halloween desserts to make, or no bake Halloween treats that you can make with your kids, this swirly chocolate bark adorned with seasonal m&ms and Halloween sprinkles is a great option! Chocolate bark in general is a pretty easy (and forgiving) treat to make, and this spooktacular bark is wonderfully festive for the spooky season.
You’ll Love This Chocolate Halloween Bark!
Level of difficulty: Easy.
Flavor: Chocolate, chocolate, and more chocolate!
Time: It will take you about 40 minutes to make your Halloween bark. This includes time to melt both rounds of chocolate on the stove, swirl, decorate, and cool your chocolate bark.
Ingredients to Make Halloween Chocolate Bark
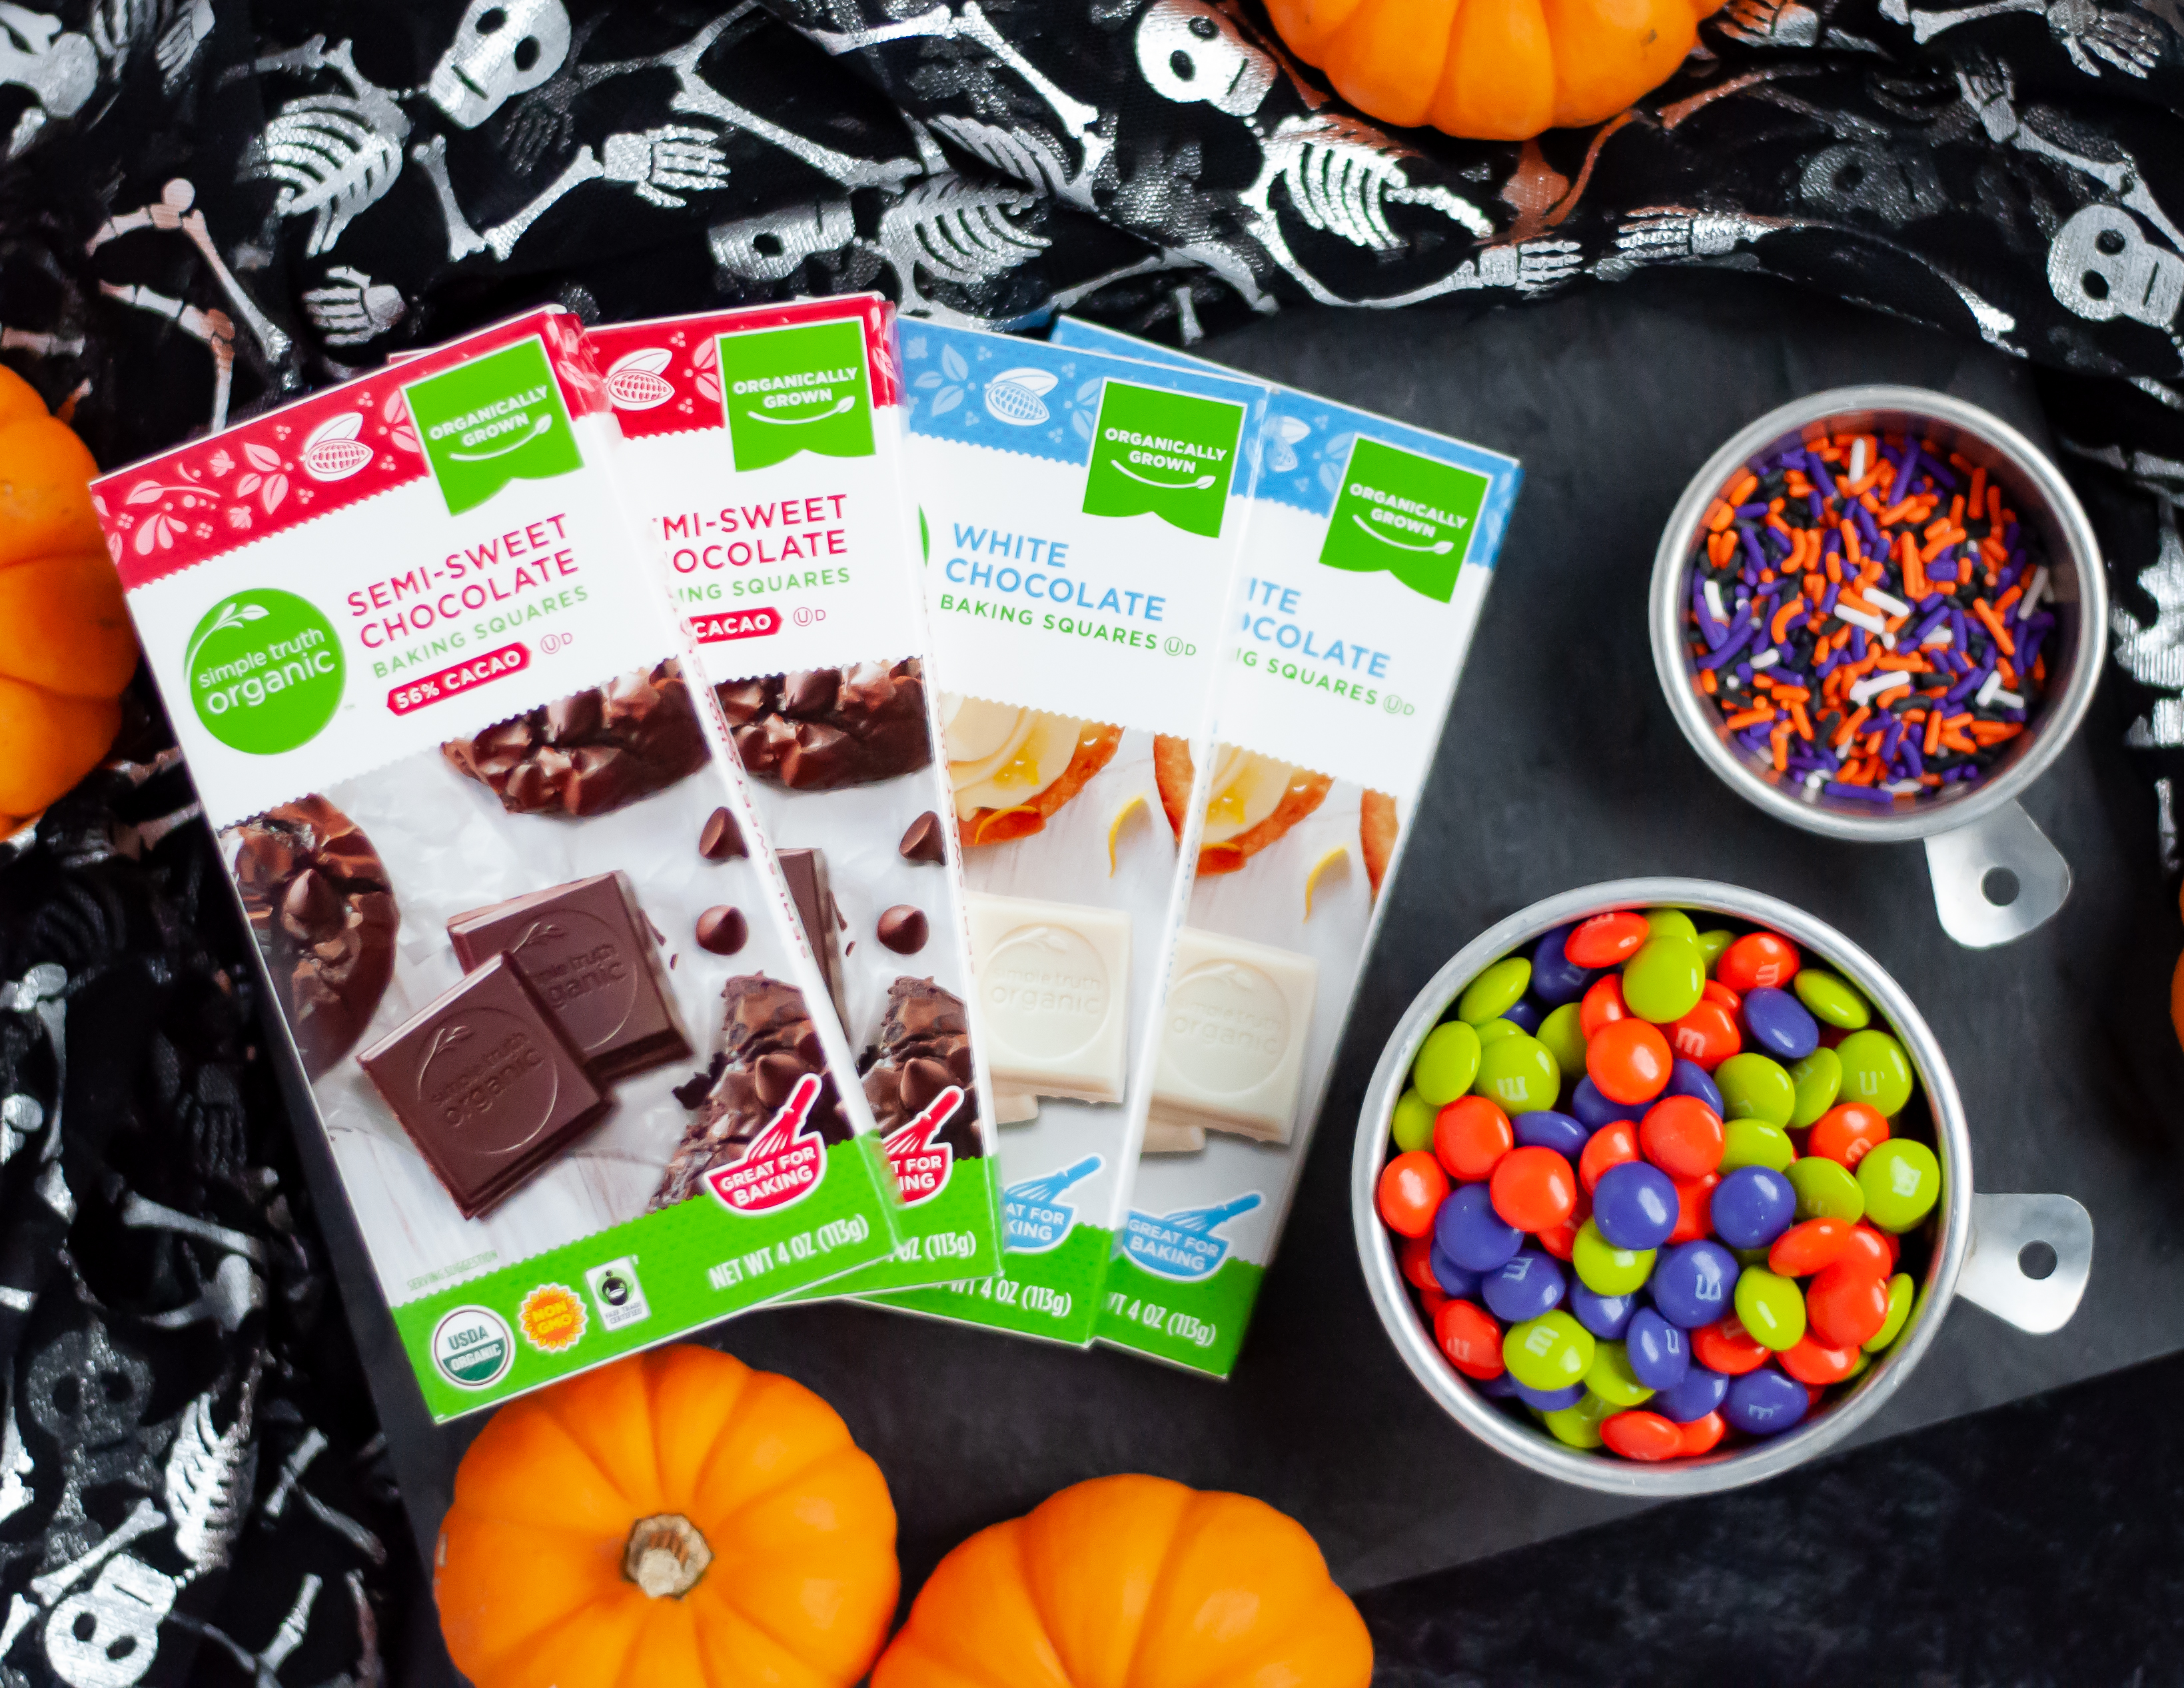
- Semi-sweet chocolate baking bars
- White chocolate baking bars
- Halloween m&ms
- Halloween sprinkles
- Optional: a tiny amount of coconut oil or a neutral oil (like grapeseed oil) – see the ‘Let’s Talk About How to Melt Chocolate’ for why you may want to use this
All ingredient measurements can be found in the recipe card at the bottom of the page.
Tips for Melting Chocolate
The two main ways to melt chocolate. The first is on the stove using the double broiler method. The second is in the microwave.
How to Melt Chocolate on the Stove with a Double Boiler
To do so, place water in the basin of the bottom pot and place it over medium heat. Place your chocolate in the top pot and stir frequently until there are very few solid pieces left. Remove the double broiler from the heat and continue to stir until all of your chocolate is melted and smooth.
Tip: you can also create a double boiler effect using a small saucepan plus a glass or metal bowl. Here is a great DIY double boiler tutorial.
How to Melt Chocolate in the Microwave
Melting chocolate in the microwave is a good way to save time, but you need to make sure to keep an eye on your chocolate and stir it frequently. To melt chocolate in the microwave, place your chocolate in a microwave safe bowl and heat in 20-second increments, stirring in between each cycle (you’ll check the melt-status of your chocolate as you stir). Once you see almost all of the solid chocolate pieces are gone, continue to stir to encourage the remaining chocolate to melt without additional heat. Your chocolate is ready once it is totally smooth.
How to Make Chocolate Halloween Bark
Line a baking sheet with parchment paper and set aside.
Melt semi-sweet chocolate: melt the semi-sweet chocolate on the stove using the double boiler method or in the microwave in 20-second increments, stirring frequently, until all of the chocolate is melted and smooth.
Spread melted semi-sweet chocolate into a thin layer on a lined cookie sheet: pour the melted chocolate onto the lined baking sheet, and spread into a thin and even layer with a spatula. Note: the chocolate does not need to go to the edges! I usually have 2-3” between the edge of my chocolate and the sides of the baking sheet after spreading it.
Melt white chocolate: melt the white chocolate on the stove using the double boiler method or in the microwave in 20-second increments, stirring frequently, until all of the chocolate is melted and smooth.
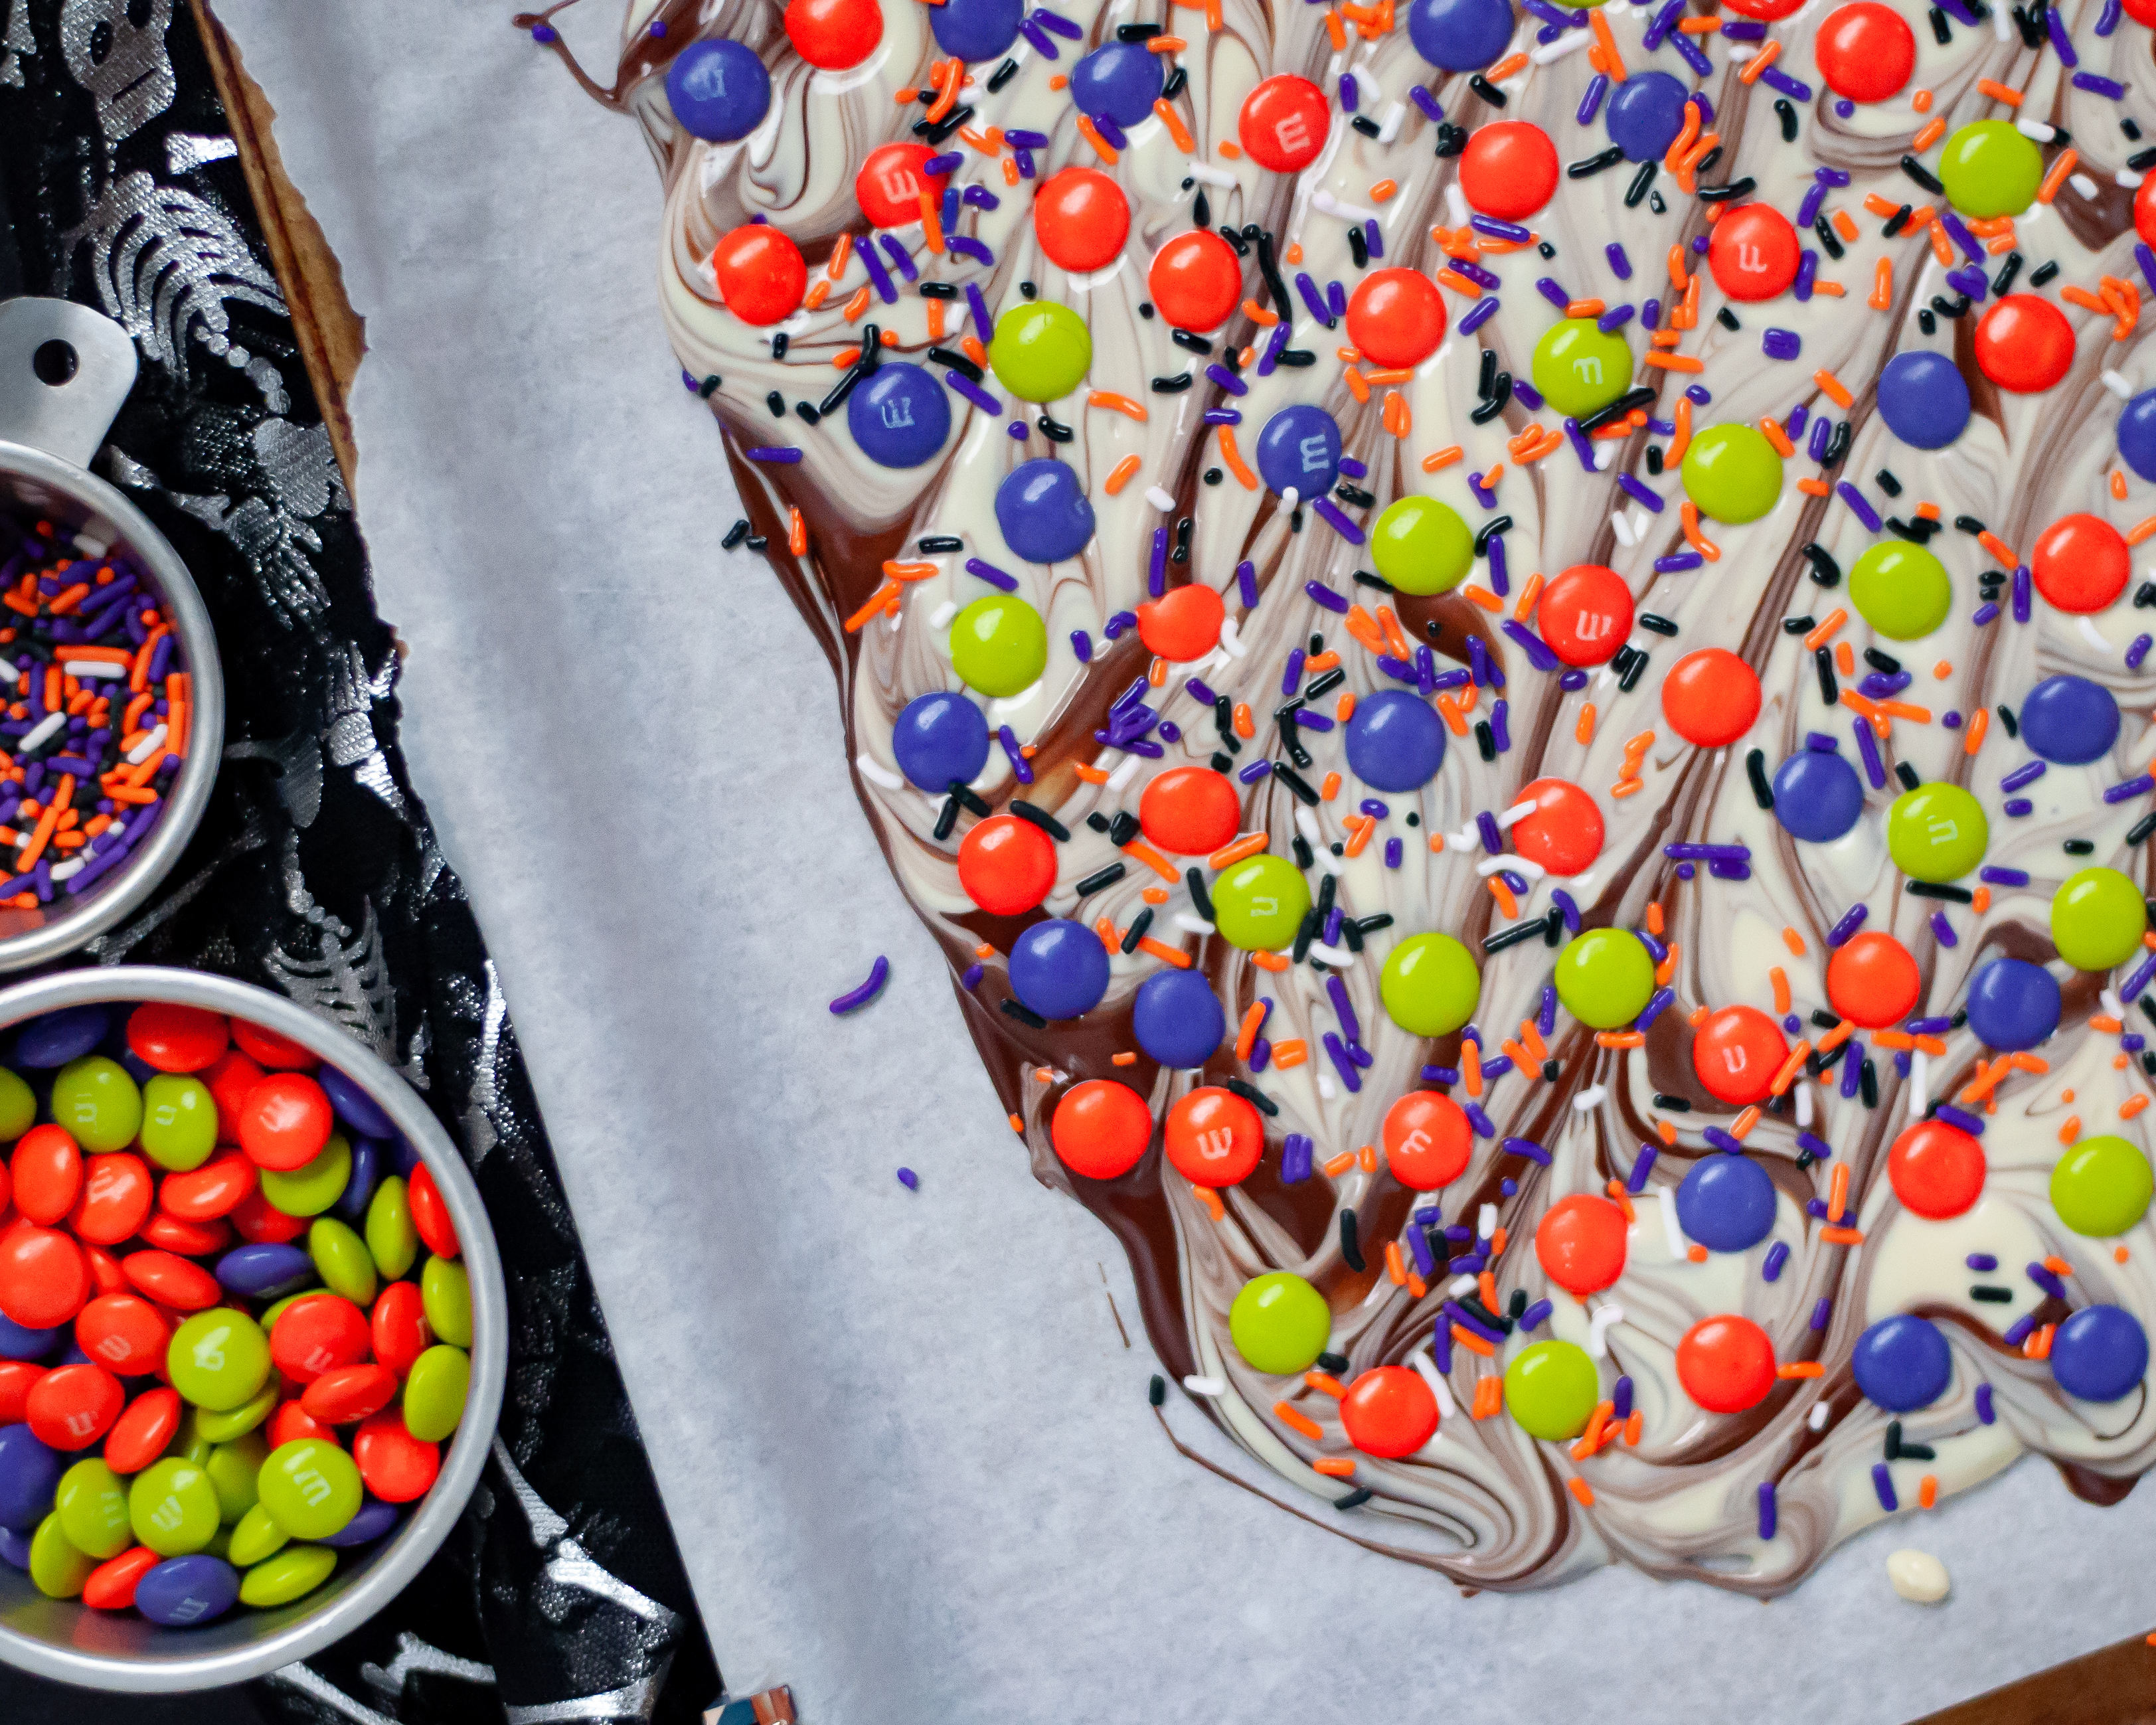
Pour melted white chocolate over the semi-sweet chocolate layer: pour the melted white chocolate over the semi-sweet chocolate layer. You can either pour it in stripes, or gently spread it into somewhat of a layer over the semi-sweet chocolate (it does not need to be evenly distributed or fully covering the semi-sweet layer as you will be swirling it).
Swirl the chocolates: using a butter knife, gently run the knife back and forth through the chocolate to create swirls. You can do this in a zig-zagging pattern, or swirl freely, to create the design you like!
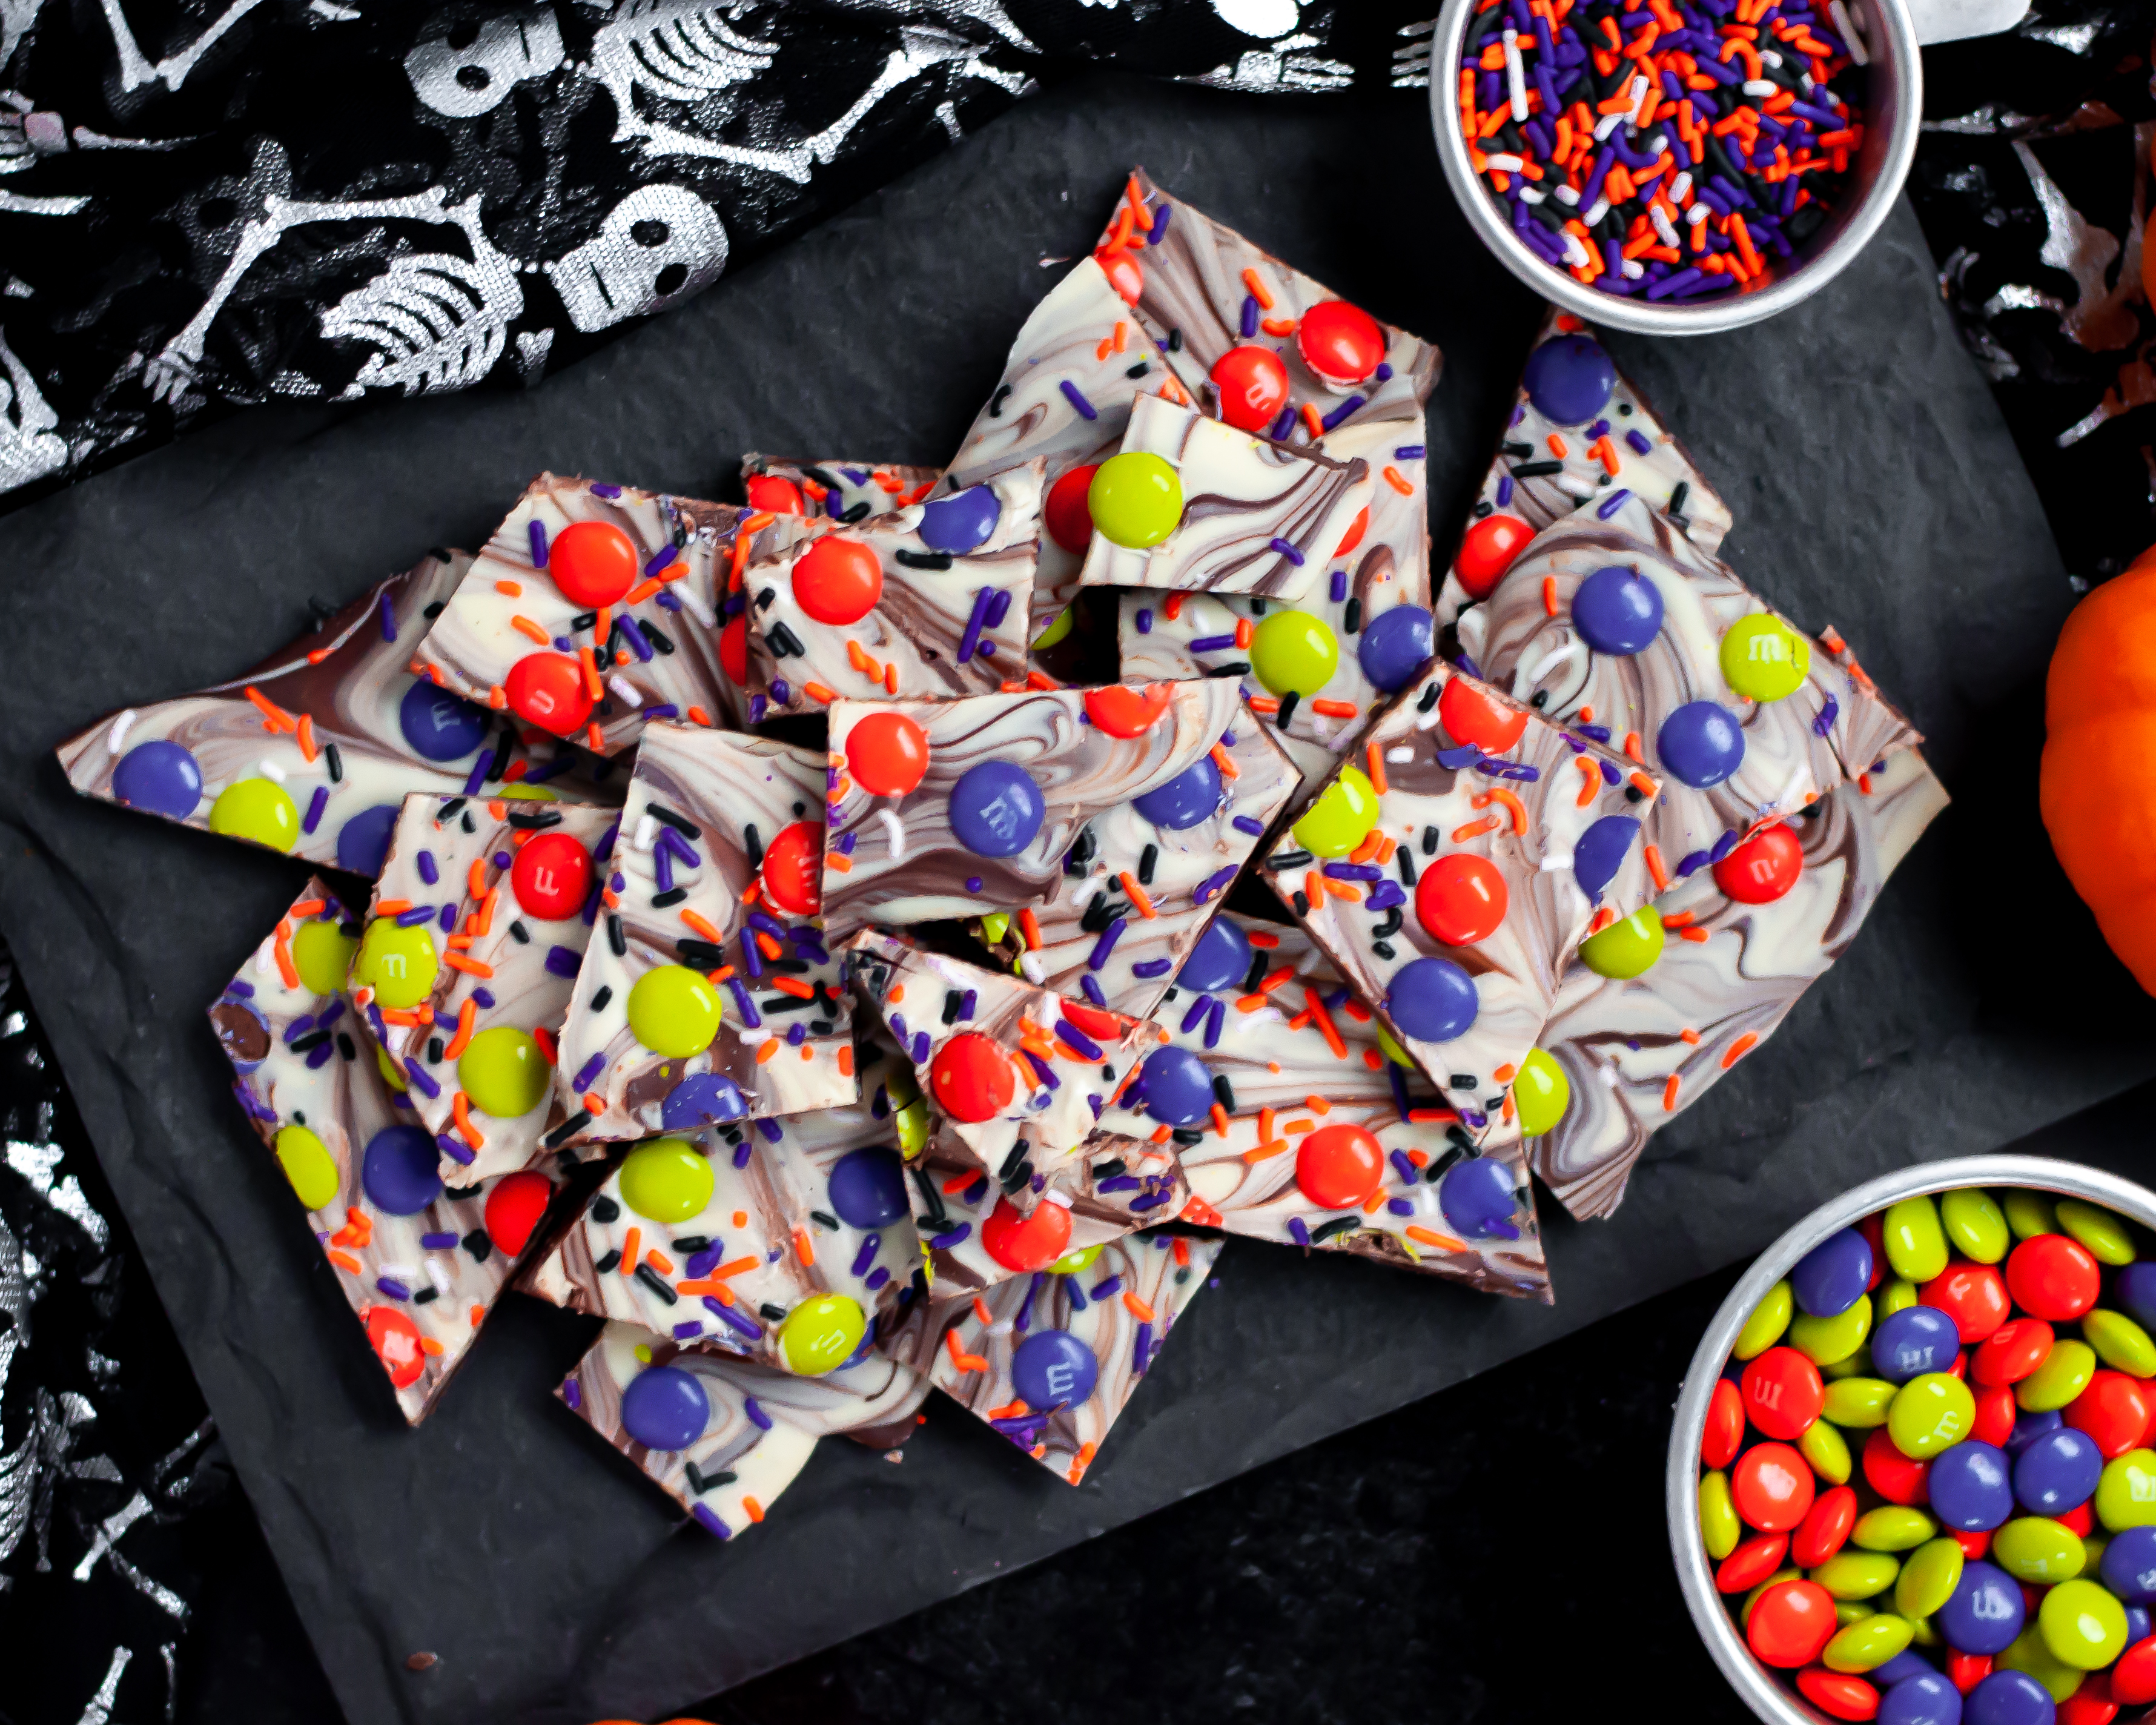
Top with Halloween m&ms and sprinkles: evenly distribute Halloween m&ms and Halloween sprinkles across the top of your chocolate bark.
Place the chocolate bark in the fridge to set up: place your pan on a flat surface in your fridge to harden (about 15-20 minutes will do it!).
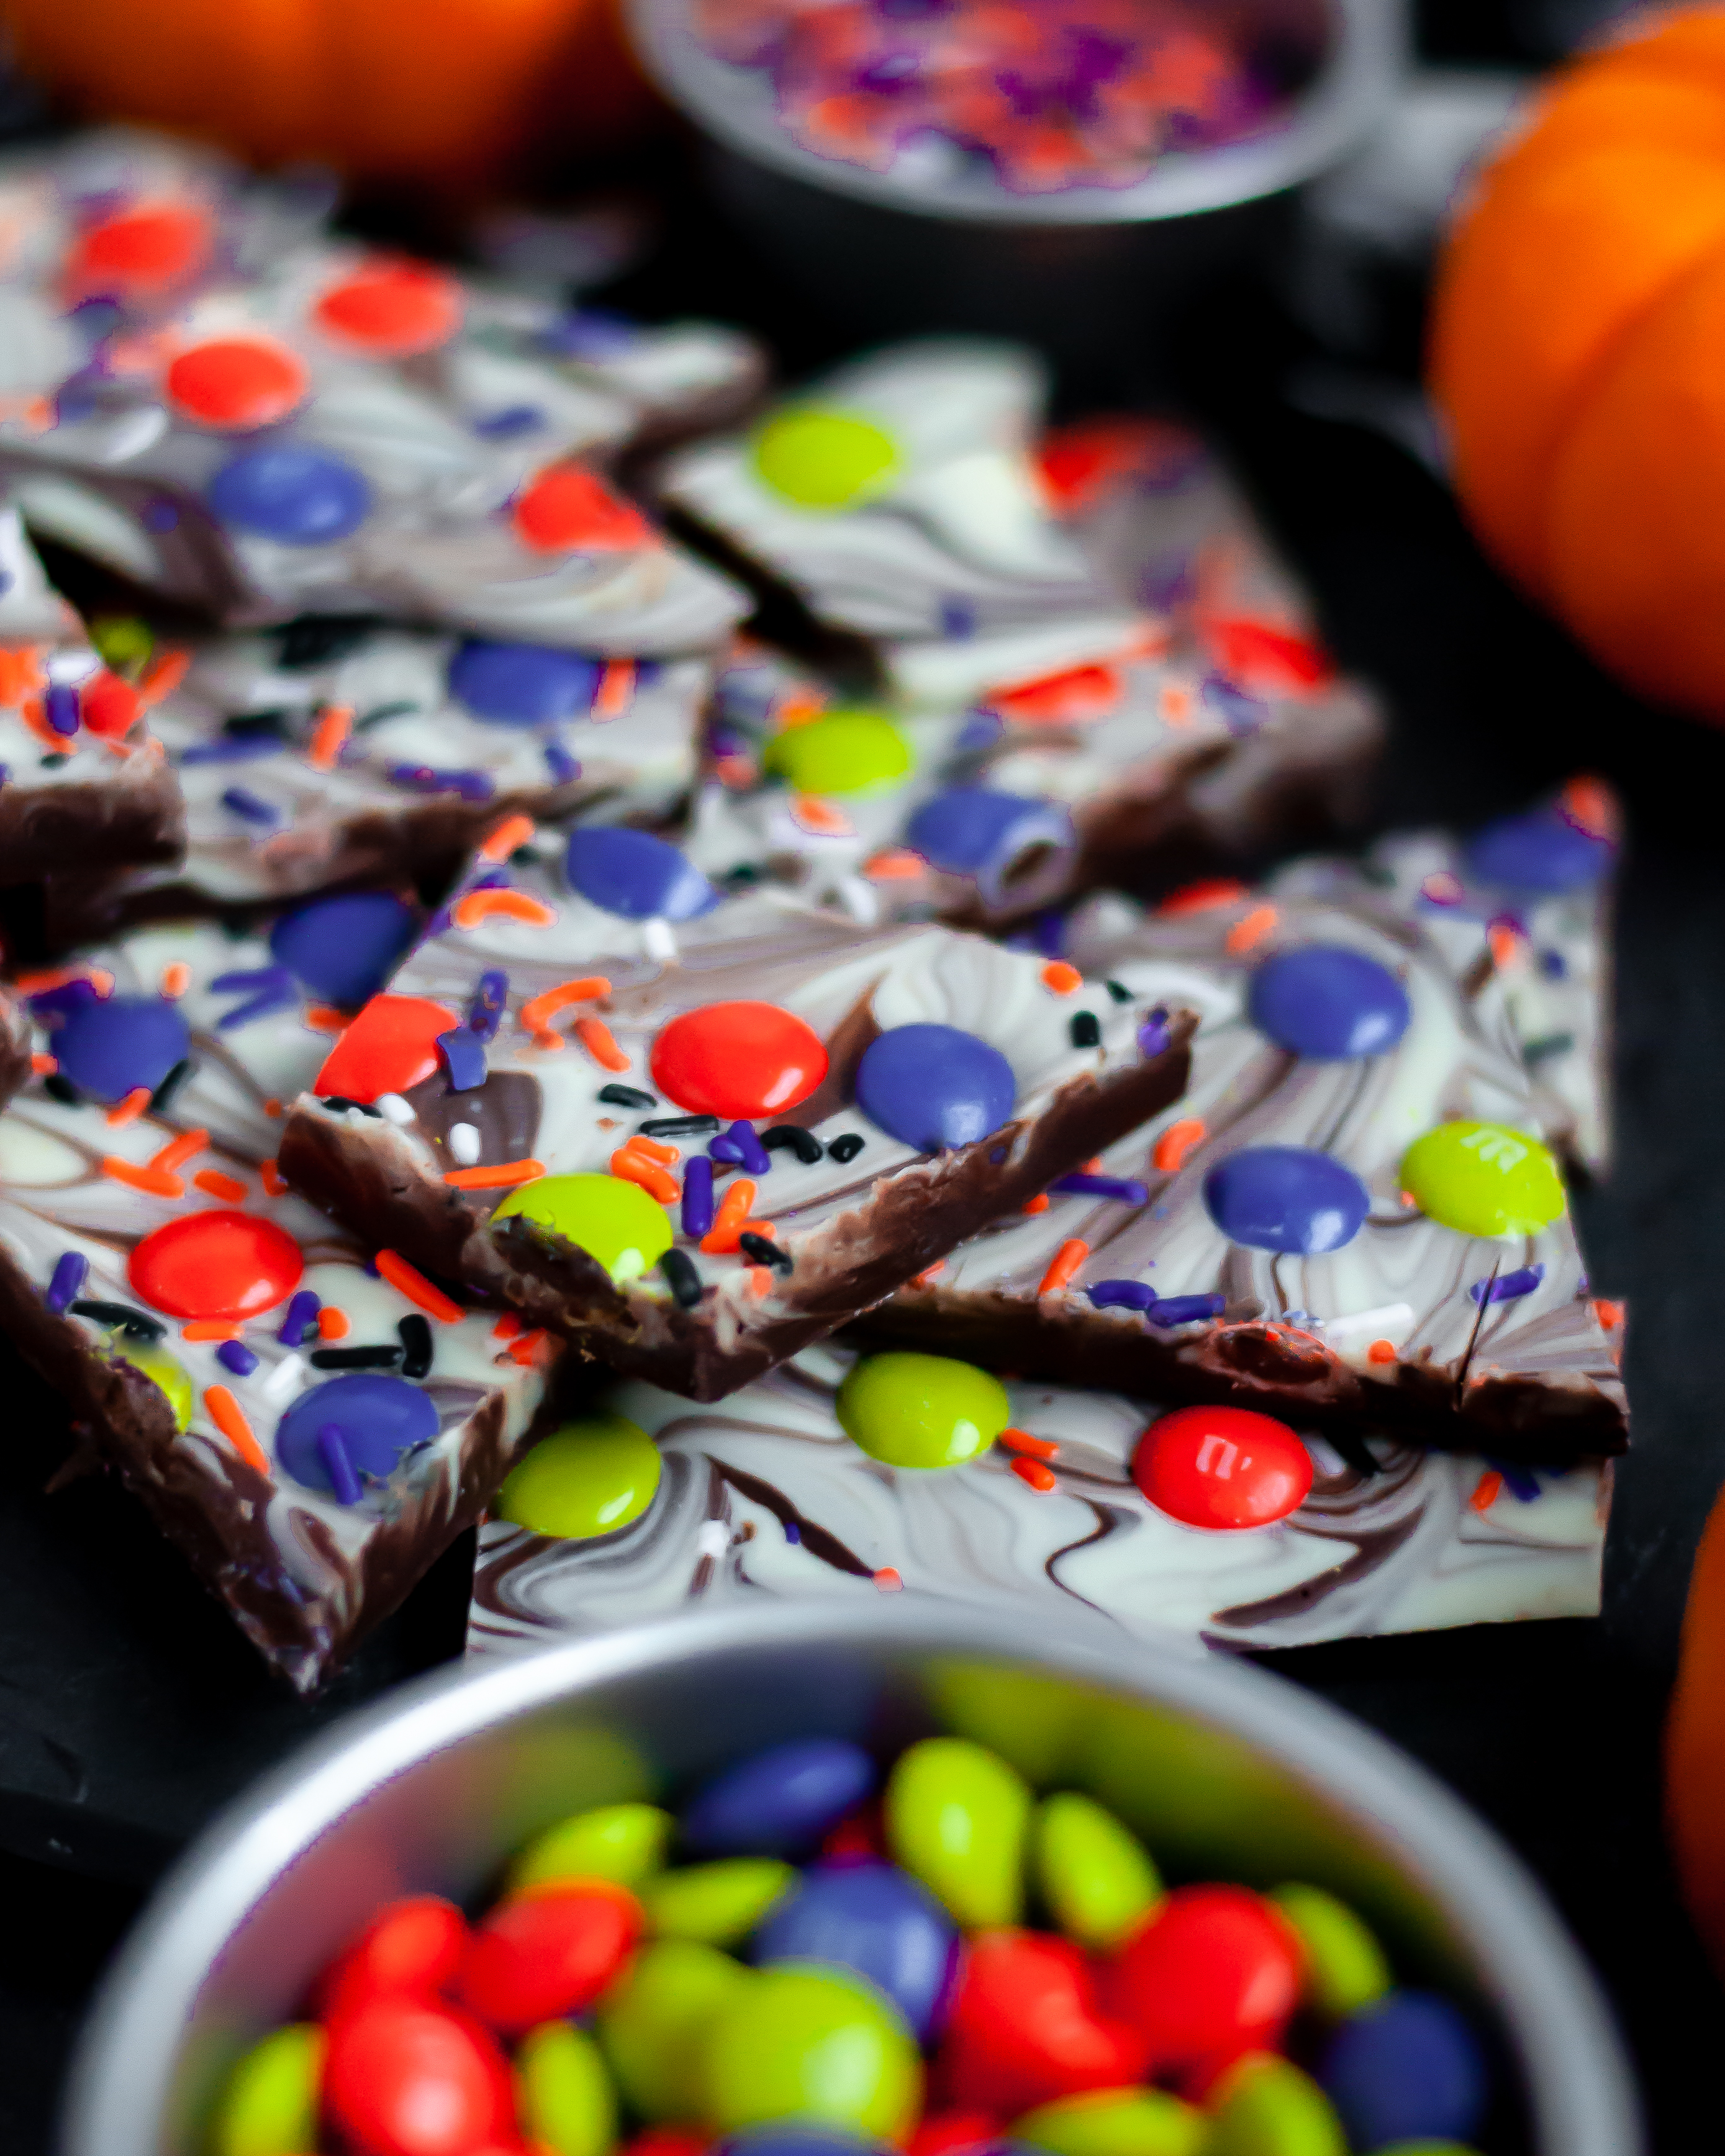
Cut or break into pieces and serve: once hardened, cut or break your bark into the size pieces you’d like, serve, and enjoy!
Store chocolate bark in the fridge: store chocolate bark in the fridge in an air-tight container for up to 3 weeks (if it lasts that long!)
Expert Tips
Use binder clips to hold your parchment paper in place! I like to binder clip my parchment paper to the sides of my cookie sheet so it doesn’t move around. This is especially helpful when making chocolate bark because you are moving the chocolate around on the sheet to create your layers (and in this recipe, swirling your chocolates together too).
How to melt white chocolate – tips for success: White chocolate is notoriously challenging to melt. It has a lower melting point than milk or dark chocolate, making it more likely to seize up. Two pro tips that will increase your chances of a successful melt are:
- Use a high-quality baking bar instead of white chocolate chips. Did you know most chocolate chips have stabilizers in them to help them from melting? This does not help the cause when trying to melt white chocolate! A good quality white chocolate baking bar is a better choice for treats requiring melted chocolate
- Add a small amount of oil. This can help with the melting process as it helps prevent your chocolate from drying out. I like to use a very small amount of a neutral oil, like grapeseed or canola oil, when melting white chocolate. You do need to be careful not to use too much as it can result in a softer chocolate. Adding a small amount of coconut oil is also a popular option, as it is a solid when cooled.
Love This Recipe? Try One of These Next!


Halloween Chocolate Bark with Sprinkles
Ingredients
- 2, 4 oz semi-sweet chocolate baking bars
- 2, 4 oz white chocolate baking bars
- ¼ – ⅓ C Halloween M&Ms
- 1-2 tablespoon Halloween Sprinkles
- Optional: ¼-1/2 teaspoon of coconut oil or a neutral oil to assist with melting the chocolate*
Instructions
- Line a baking sheet with parchment paper and set aside
- Melt the semi-sweet chocolate on the stove or in the microwave, stirring frequently, until all of the chocolate is melted and smooth
- Pour the melted chocolate onto the lined baking sheet, and spread into a thin and even layer with a spatula.*
- Melt the white chocolate on the stove or in the microwave, stirring frequently, until all of the chocolate is melted and smooth
- Pour the melted white chocolate over the semi-sweet chocolate layer. You can either pour it in stripes, or gently spread it into somewhat of an even layer over the semi-sweet chocolate (it does not need to be evenly distributed or fully covering the semi-sweet layer as you will be swirling it)
- Swirl by gently running a butter knife back and forth through the chocolate to create swirls. You can do this in a zig-zagging pattern, or swirl freely, to create the design you like!
- Evenly distribute Halloween m&ms and Halloween sprinkles across the top of your chocolate bark
- Place your pan on a flat surface in your fridge to harden
- Once set, cut or break your bark into the size pieces you’d like, serve, and enjoy!
- Store chocolate bark in the fridge in an air-tight container for up to 3 weeks (if it lasts that long!)
Leave a Reply